User manual
Go through the user manual which matters to you
Please scroll through this manual for guidance, or click the link to the left for the specific process you are searching for.
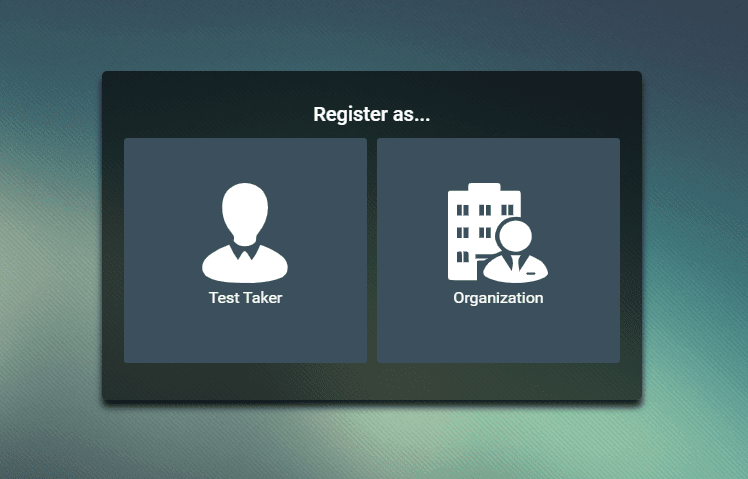
Register/Login
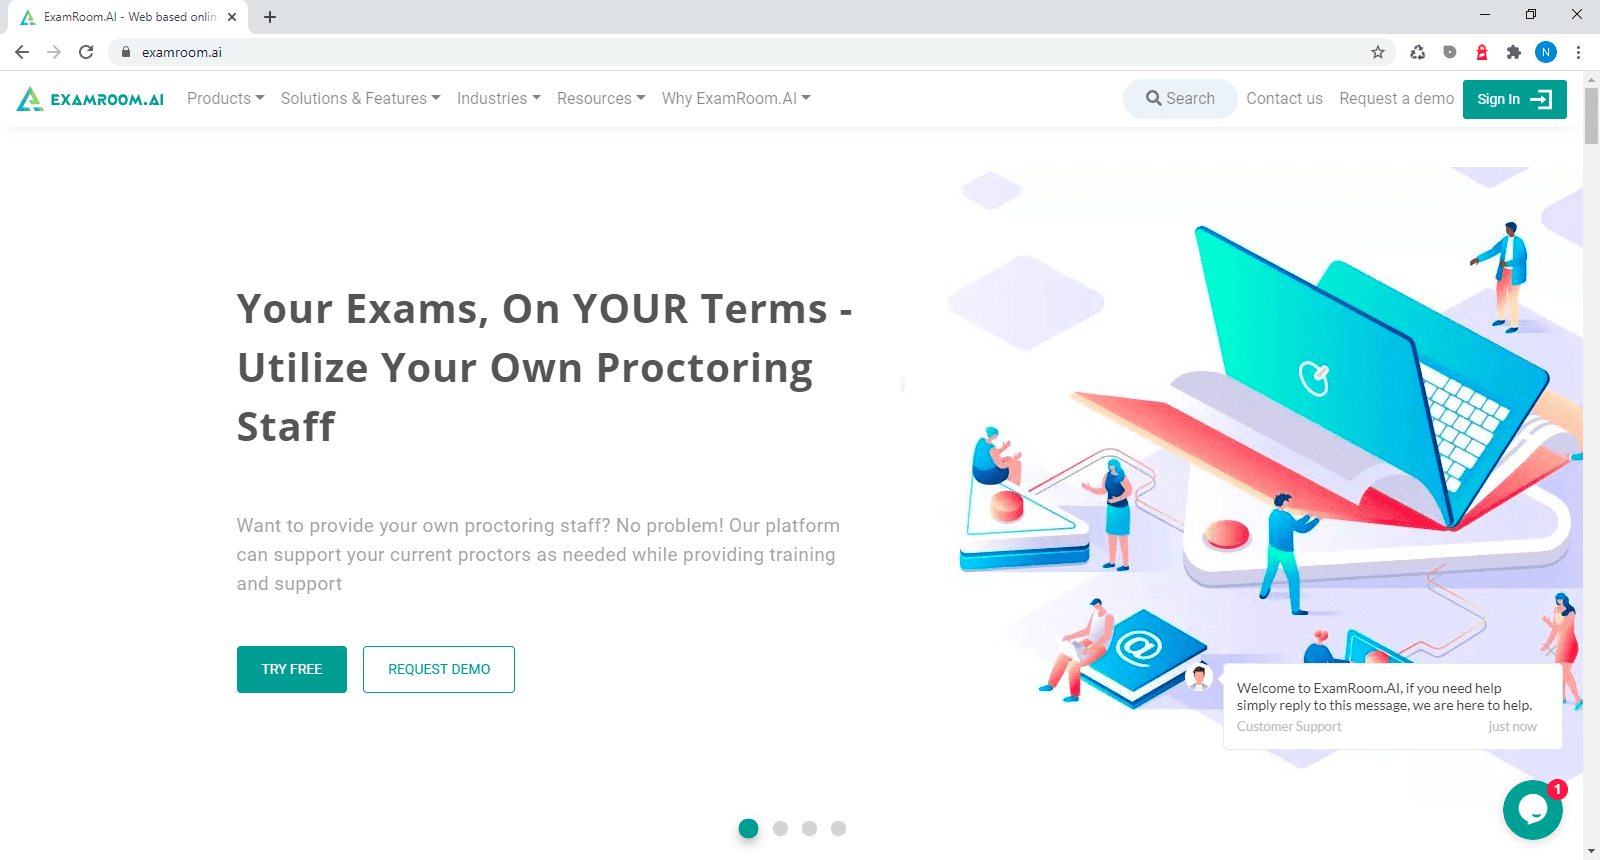
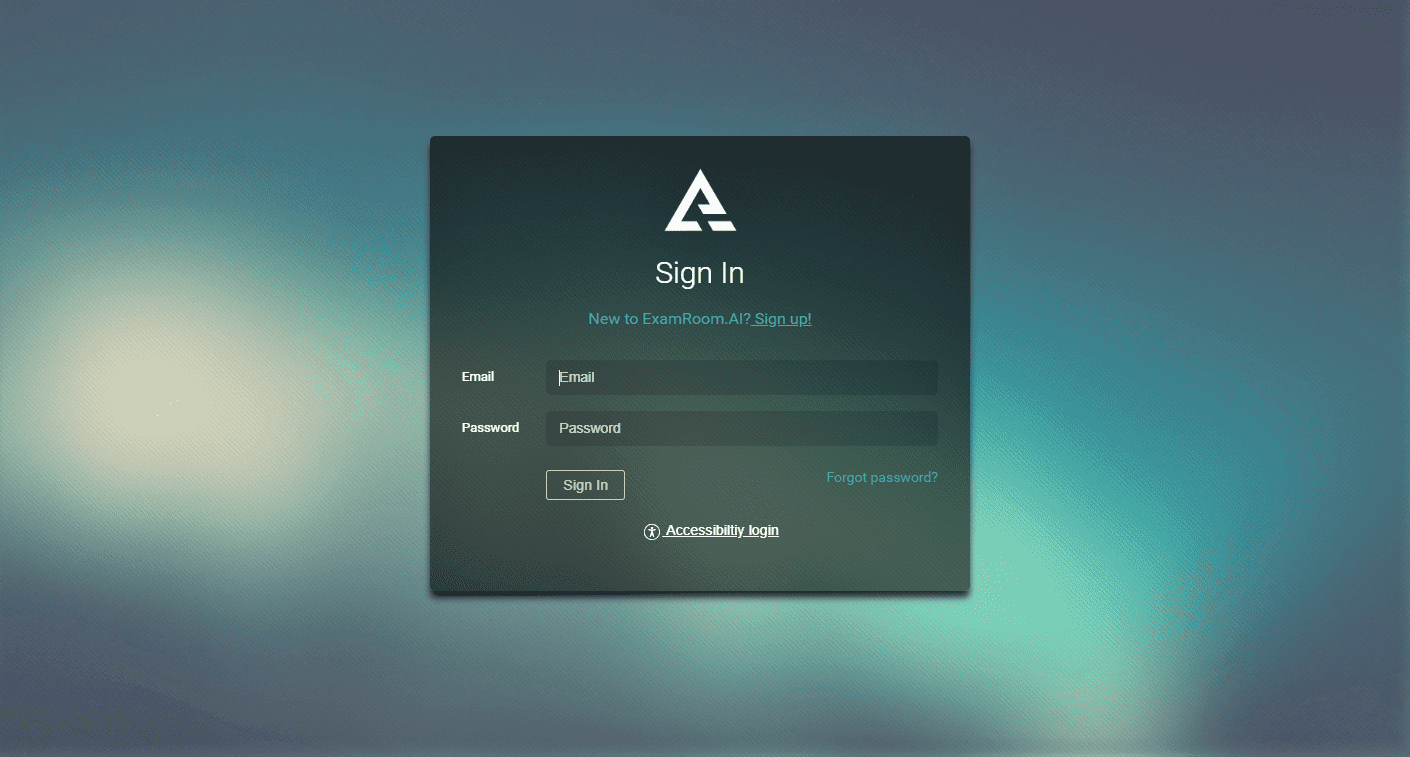
- Visit https://examroom.ai and click on Sign In.
- If you already have an account, please enter your credentials and click Sign In.
- If you do not have credentials, click on New to ExamRoom.AI? Sign up! link.
- Click on Test taker to register as a candidate.
- Enter the required information, then click on Sign Up button.
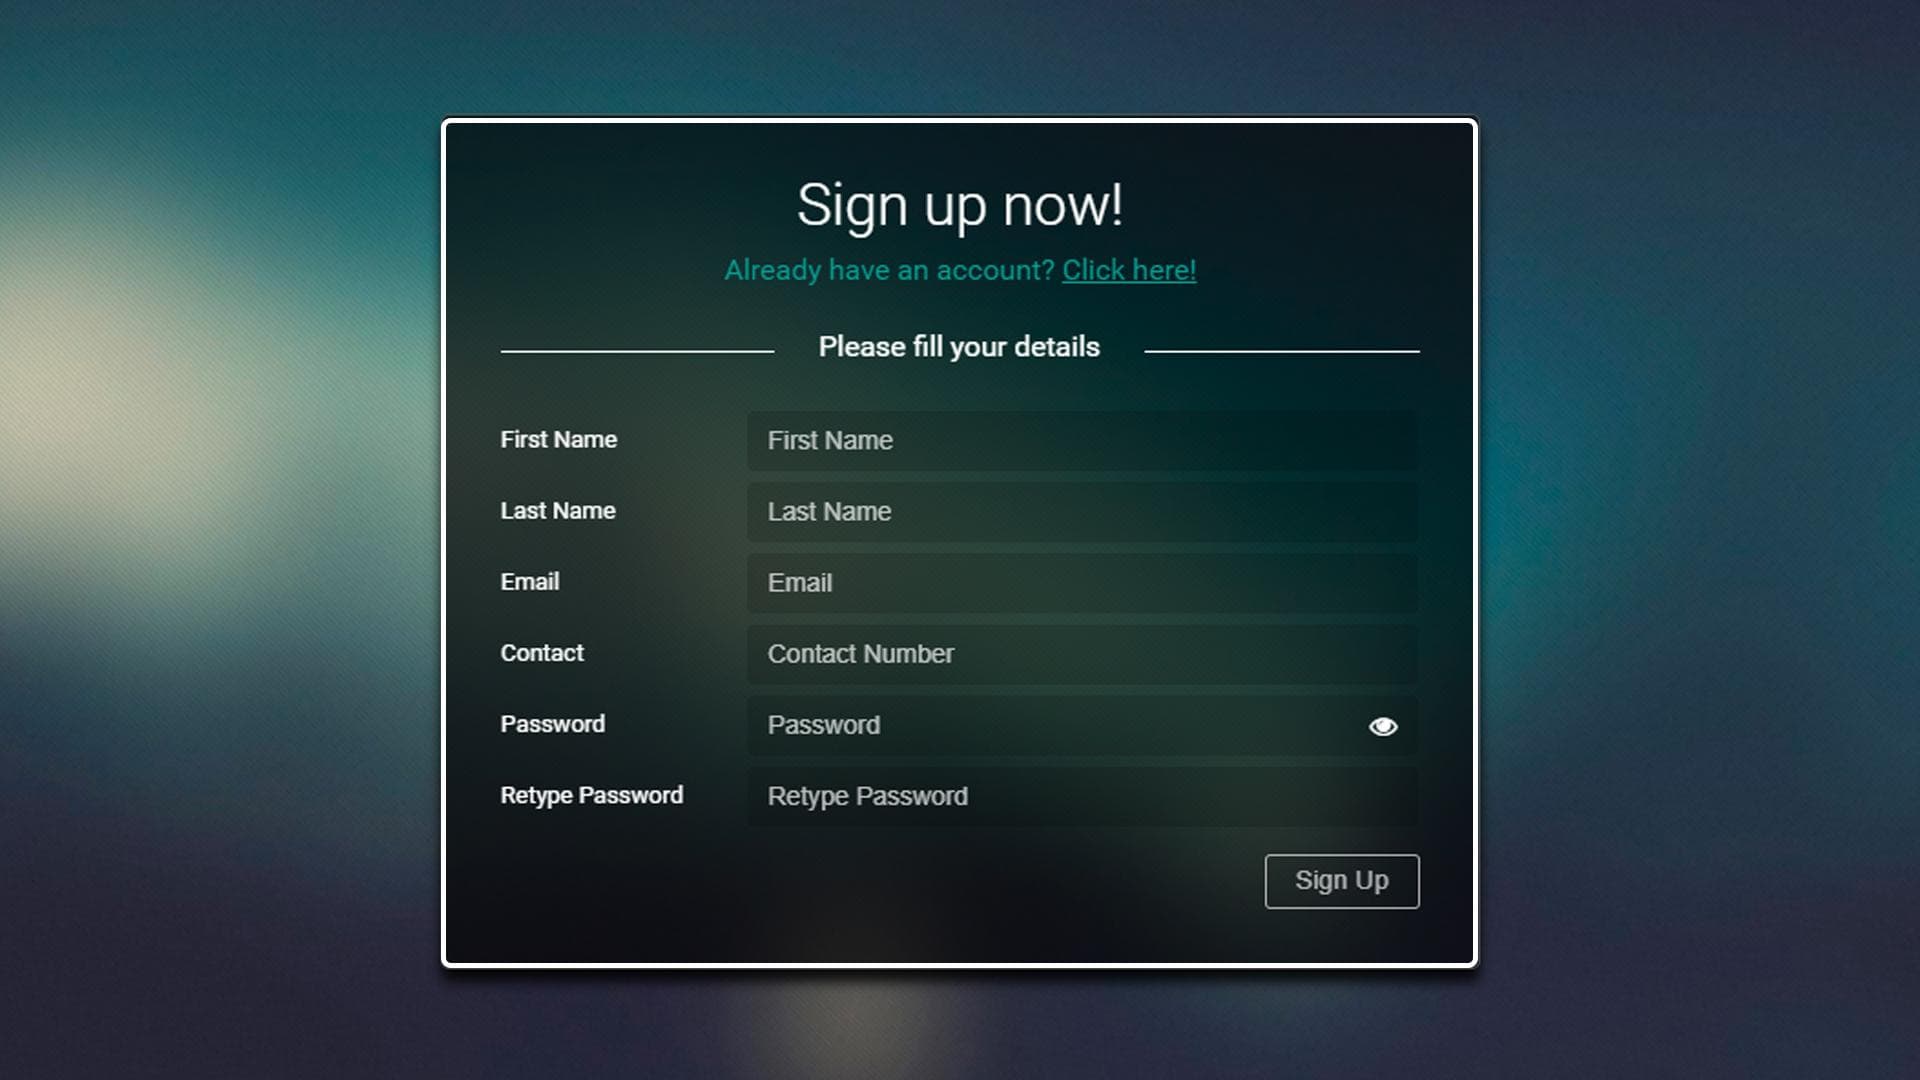
- Once the requested information is provided, and is correct, then a message will pop-up asking you to verify your email address.
- In your inbox or spam folder (based on your account settings) open the email from ExamRoom and click on the link to verify your email.
Identity Registration - If required by your Exam Sponsor
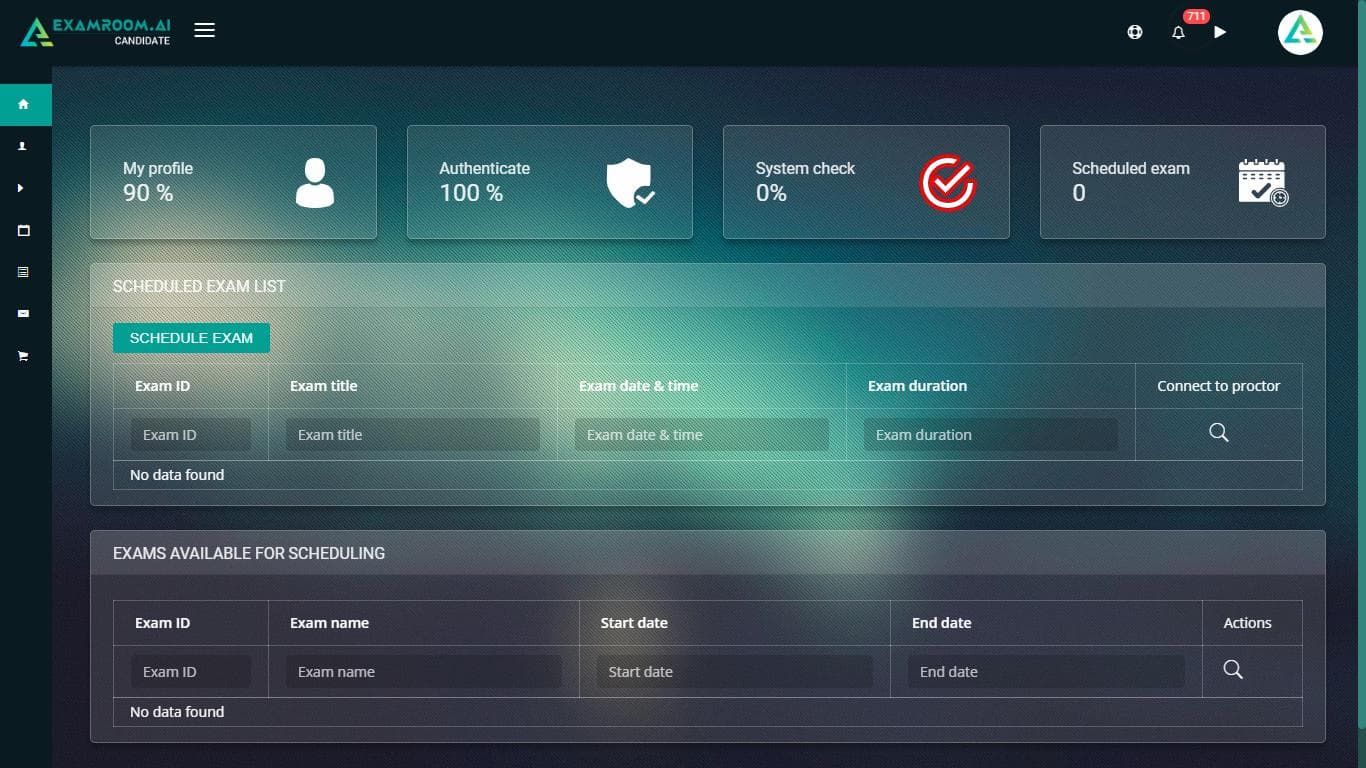
- Once you have successfully logged into your ExamRoom account, you will be brought to the Candidate Dashboard.
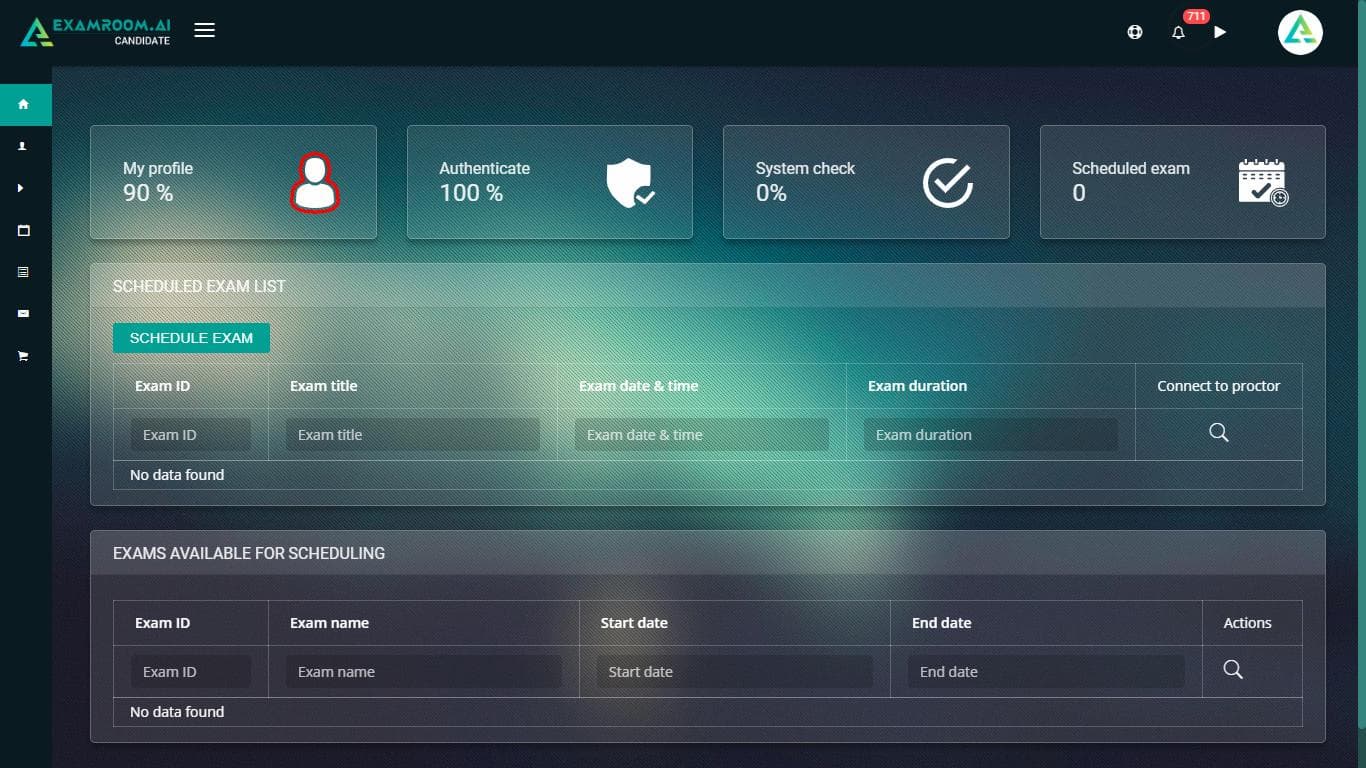
- In the top section of the Dashboard page, you can create your profile and perform a system check by clicking on the icons.

- Also, from the Dashboard page, you can schedule your exams, view exams available to be scheduled, and begin your exam.
- To continue, click the My Profile icon on the dashboard, or you can access your profile by clicking on the Profile Icon in the menu on the left hand side.
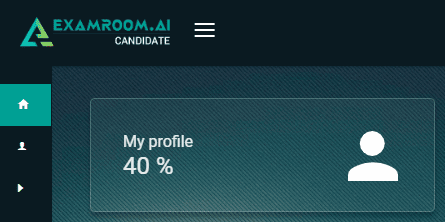
Photo ID
- Once you scroll down to the Identity Registration section, you will place your government issued photo ID, student ID, passport, or other Sponsor approved ID into the camera view.
- Align your ID with the watermark on the screen and click Capture or click your space bar.
- If the photo is clear click Done. Otherwise, click Recapture and take the photo again.

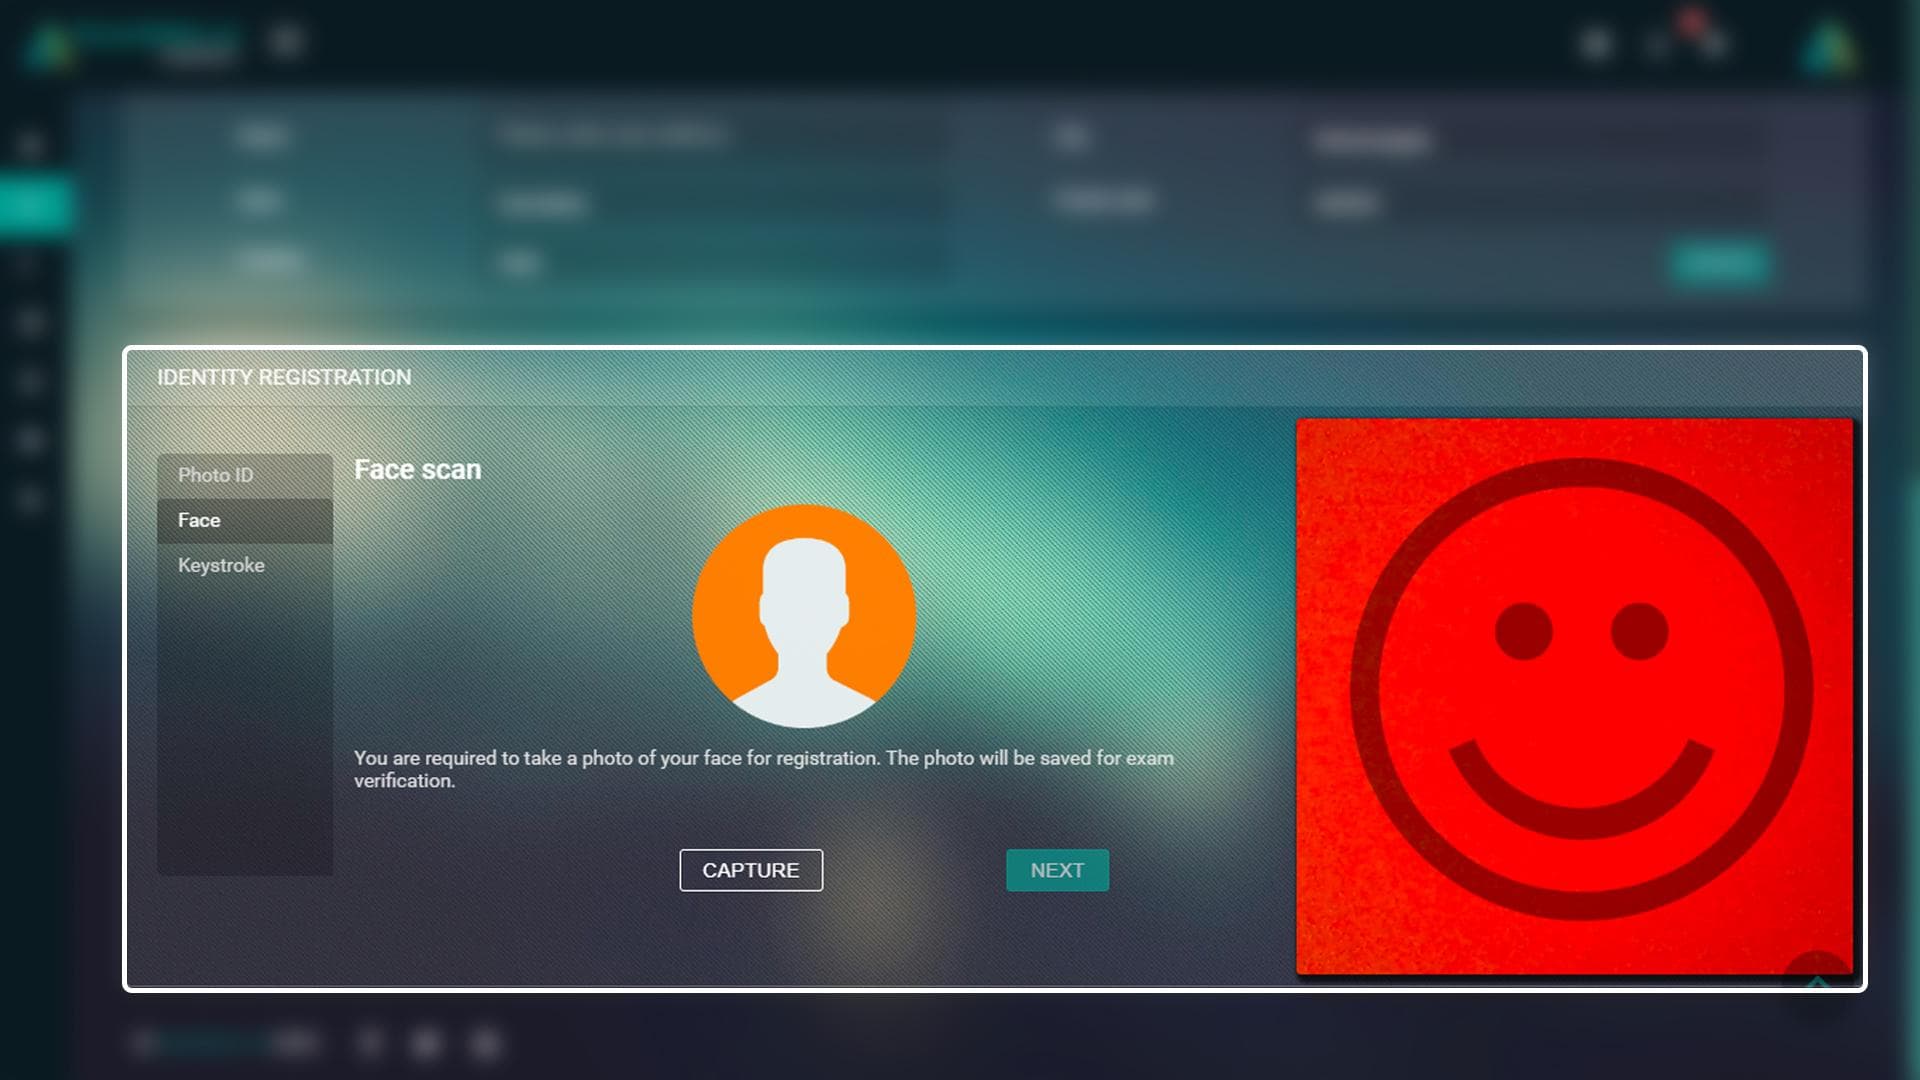
Face scan
- Next, you will move on to the Face Scan portion of your authentication process.
- Align your face in the watermark image and click Capture or your space bar.
- If the photo is clear click Next. Otherwise, click Recapture and take the photo again.
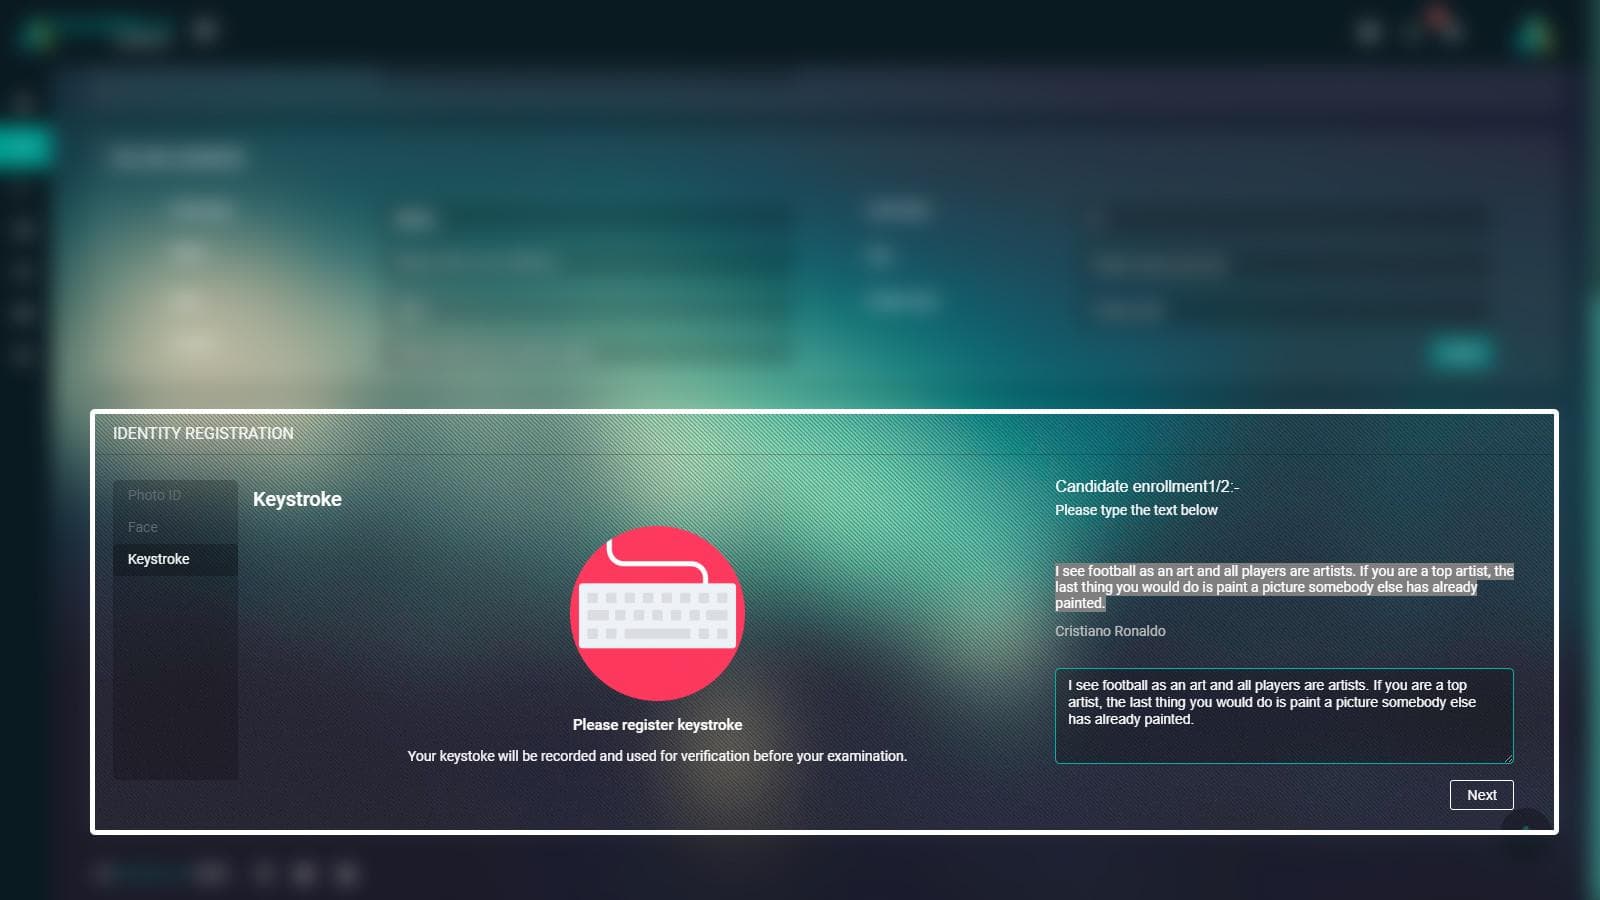
Keystroke
- The last step in creating your profile is the Typing DNA portion.
- There will be two paragraphs that you must retype.
- Retype the paragraph that is provided, and then click Next. Please make sure to pay close attention to punctuation.
- Once you have completed the second paragraph, click Register.
- Your profile will then be complete.
- Once profile setup is complete you will see all your entered information.
- To navigate from your Profile page to the Dashboard, click on the hamburger menu icon or the Dashboard icon on the left hand side.
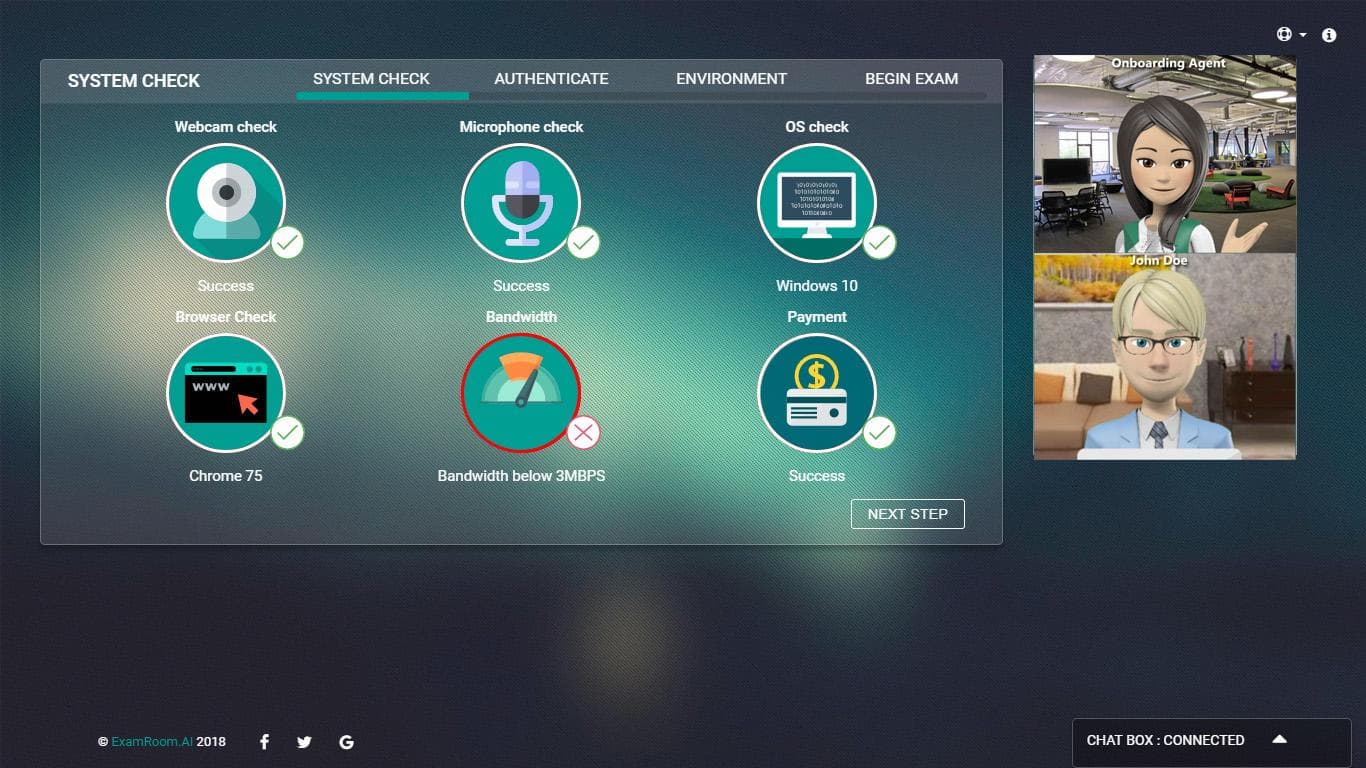
System check
- On your Candidate Dashboard page please click the System Check icon in the top listed icons. It is important to run a system check on the same computer you will be using to take your exam to ensure that all your components are working properly.
- After clicking on the System Check Icon, your system will check the following components. If all are marked green, click Done.
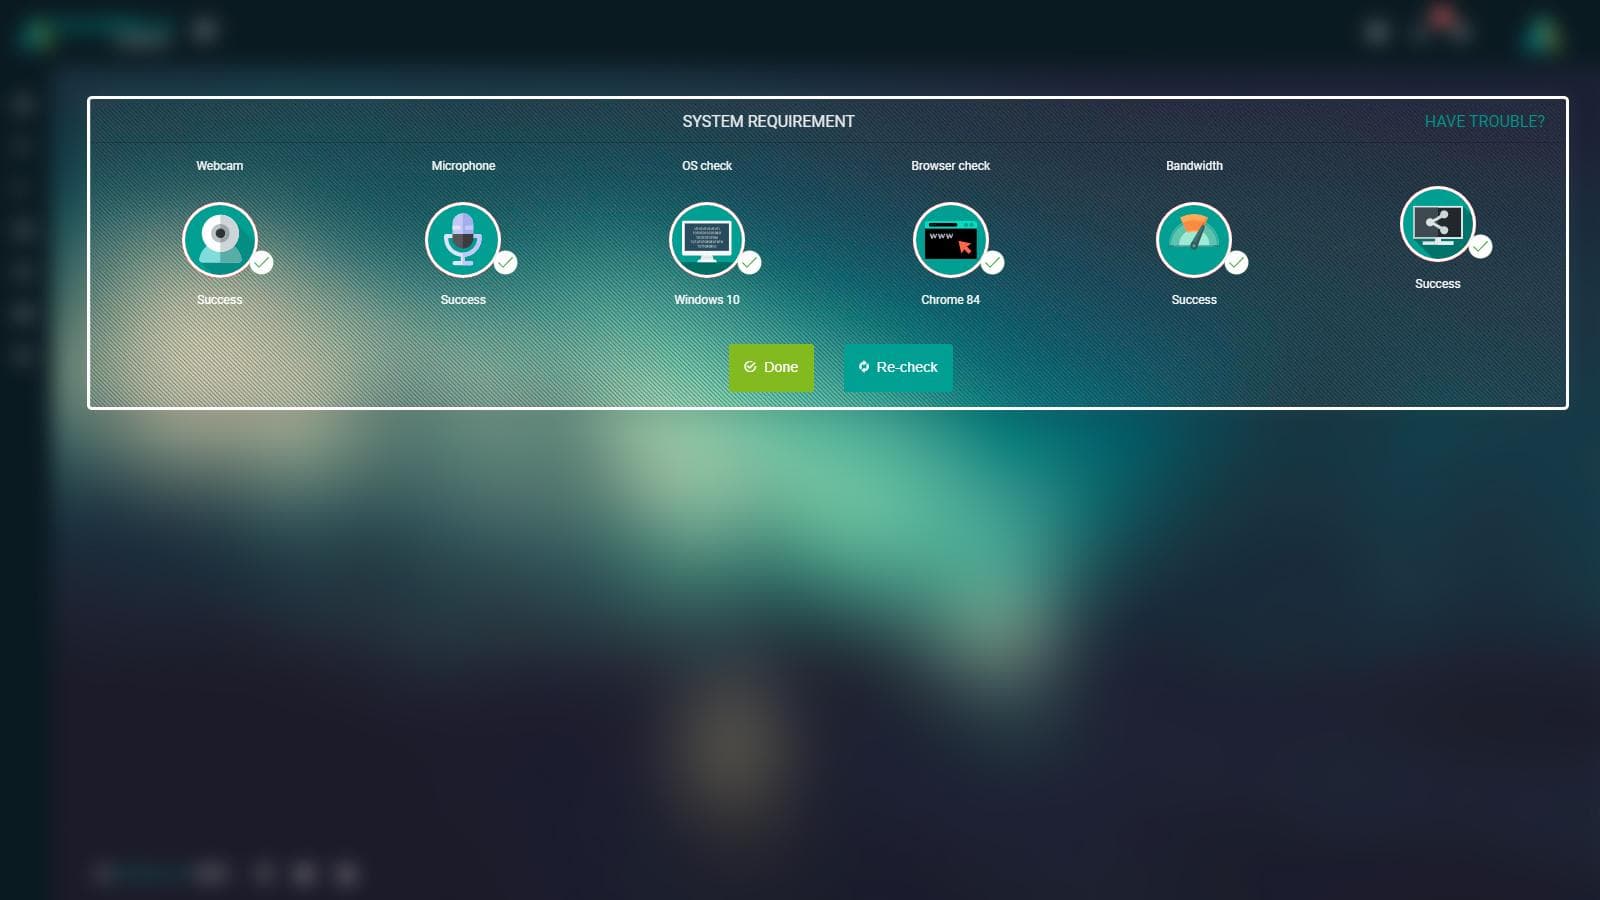
- If any item is marked red, please click on the icon to change the camera or microphone options. If your bandwidth is low, please be sure to turn off all WI-FI enabled devices or connect to the modem/router with an ethernet cord. If you do not have screen share enabled, please allow in the System Preferences for Mac computers, or you may need to download the Google Screen Share extension from the Google Chrome Extension Store.
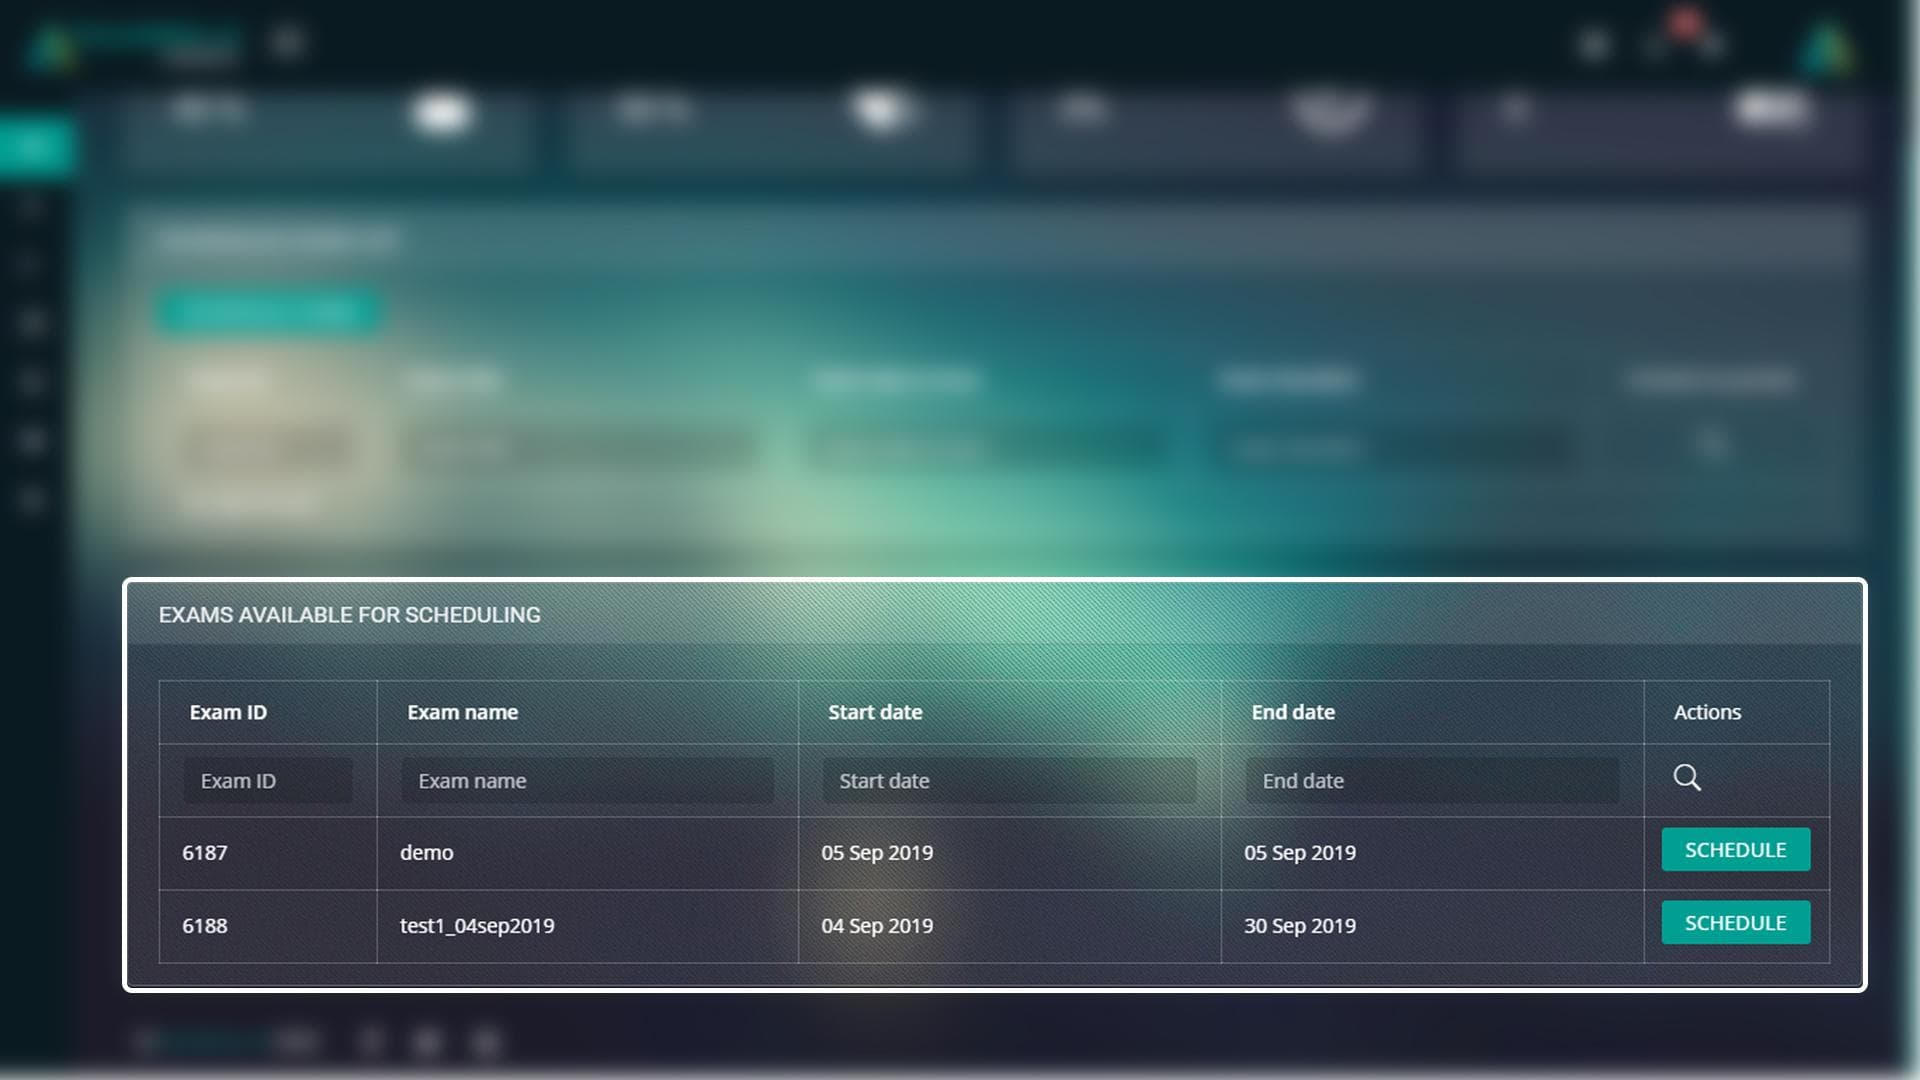
Schedule Exam
- On the Candidate Dashboard under Exams Available for Scheduling table, click on the Schedule button next to the chosen exam.
- After clicking Schedule then the scheduler/calendar will appear. Click on the available green slot for your preferred day and select your preferred time.
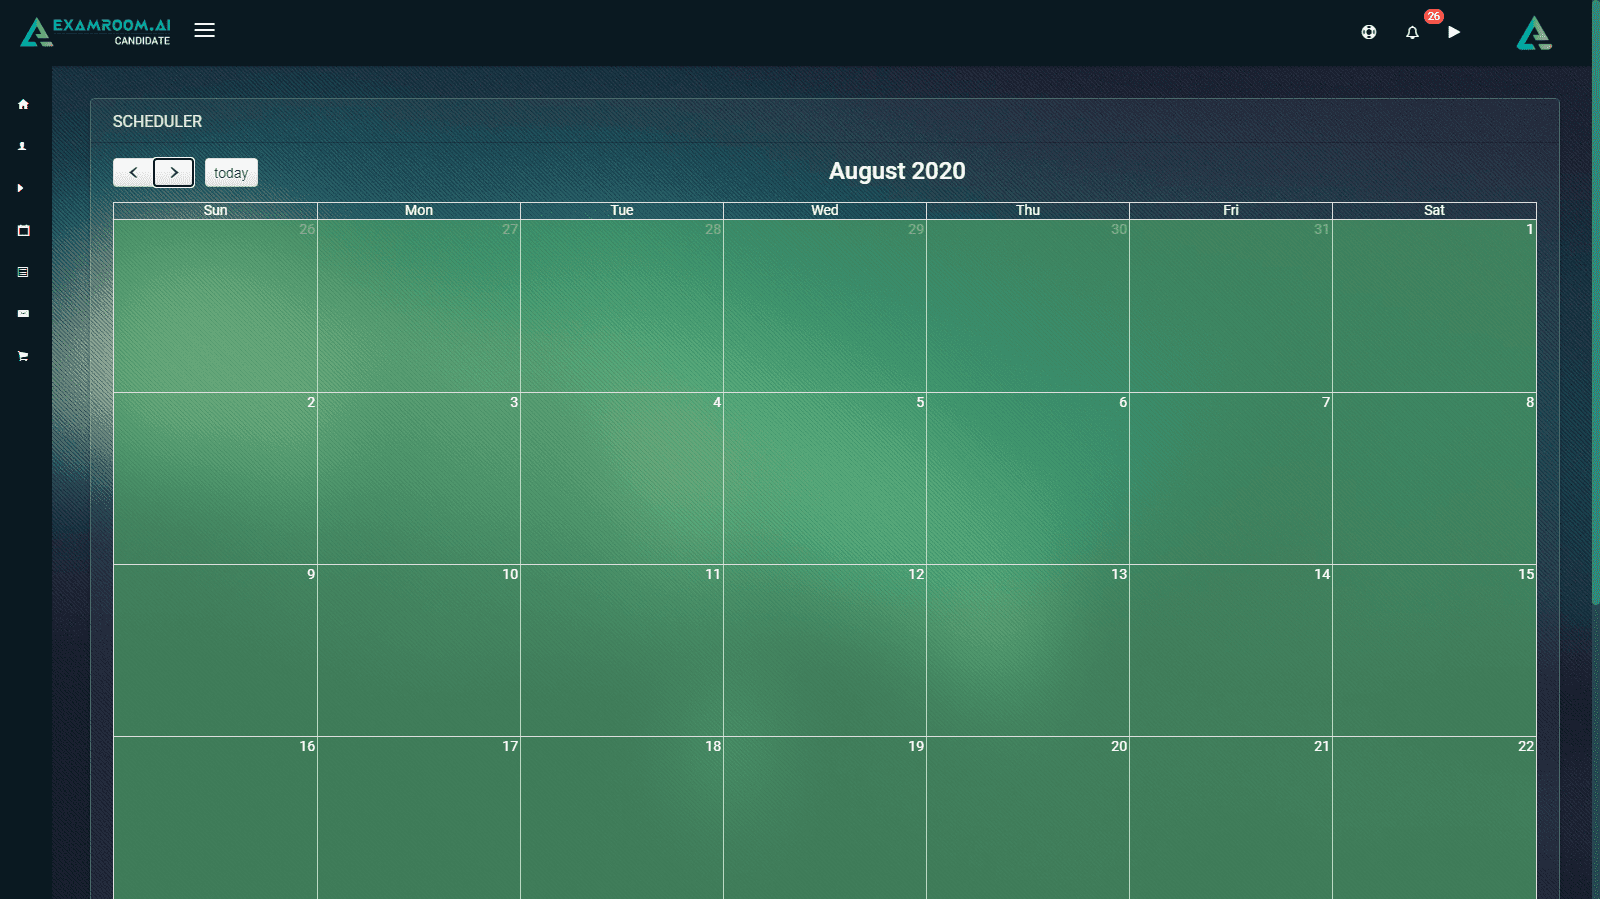
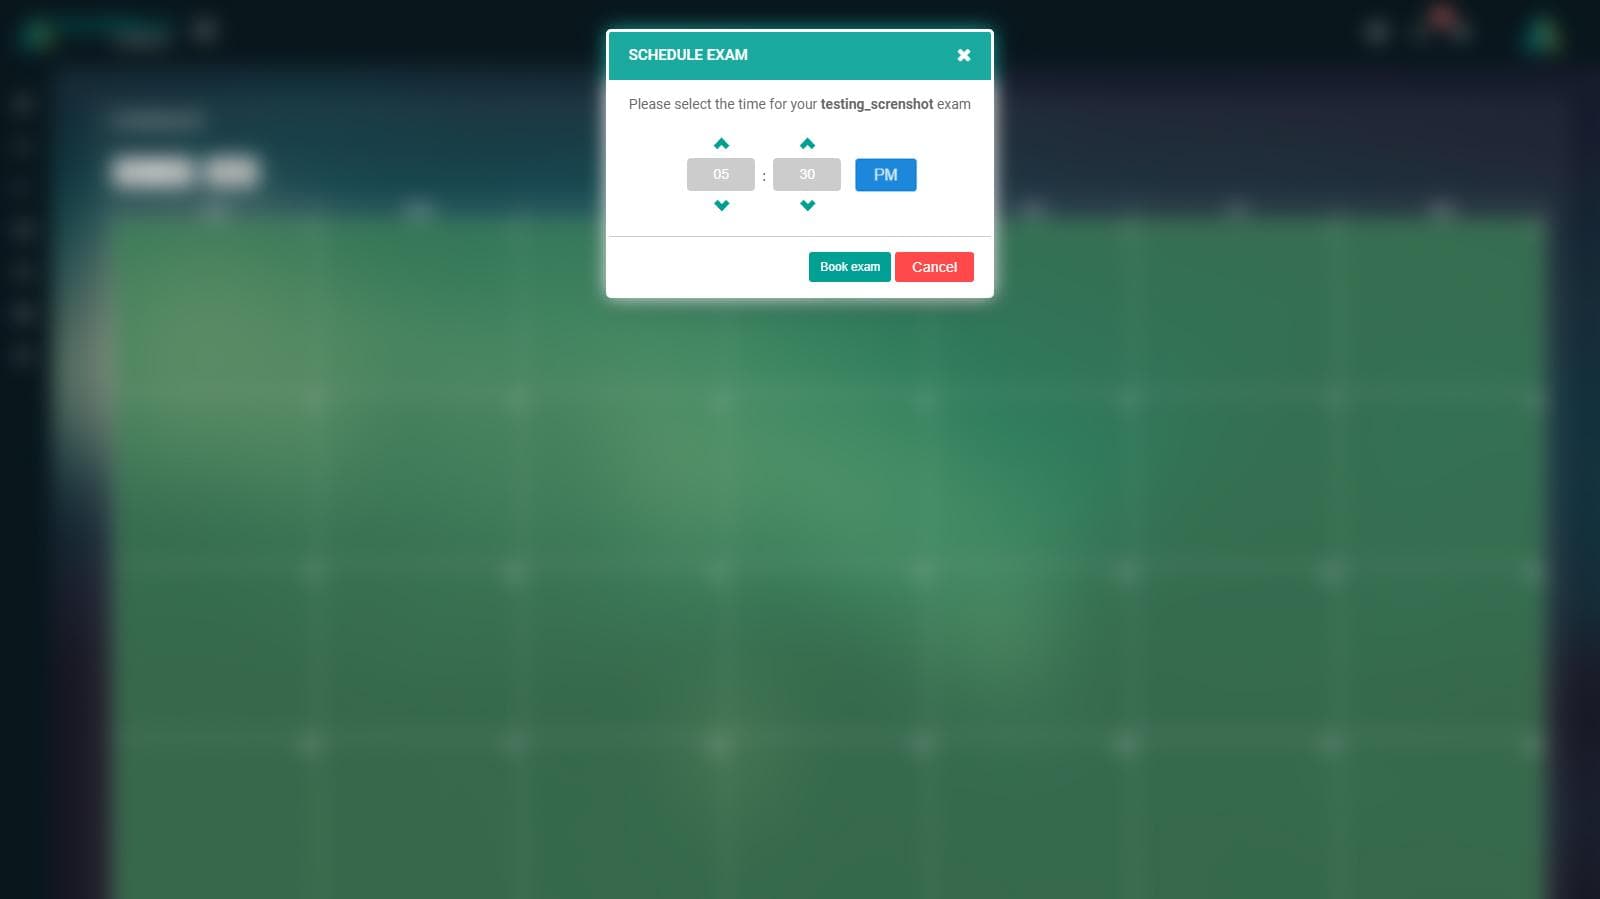
- Once you have chosen your preferred day and time, you will pick from the available time slots based on the length of your exam.
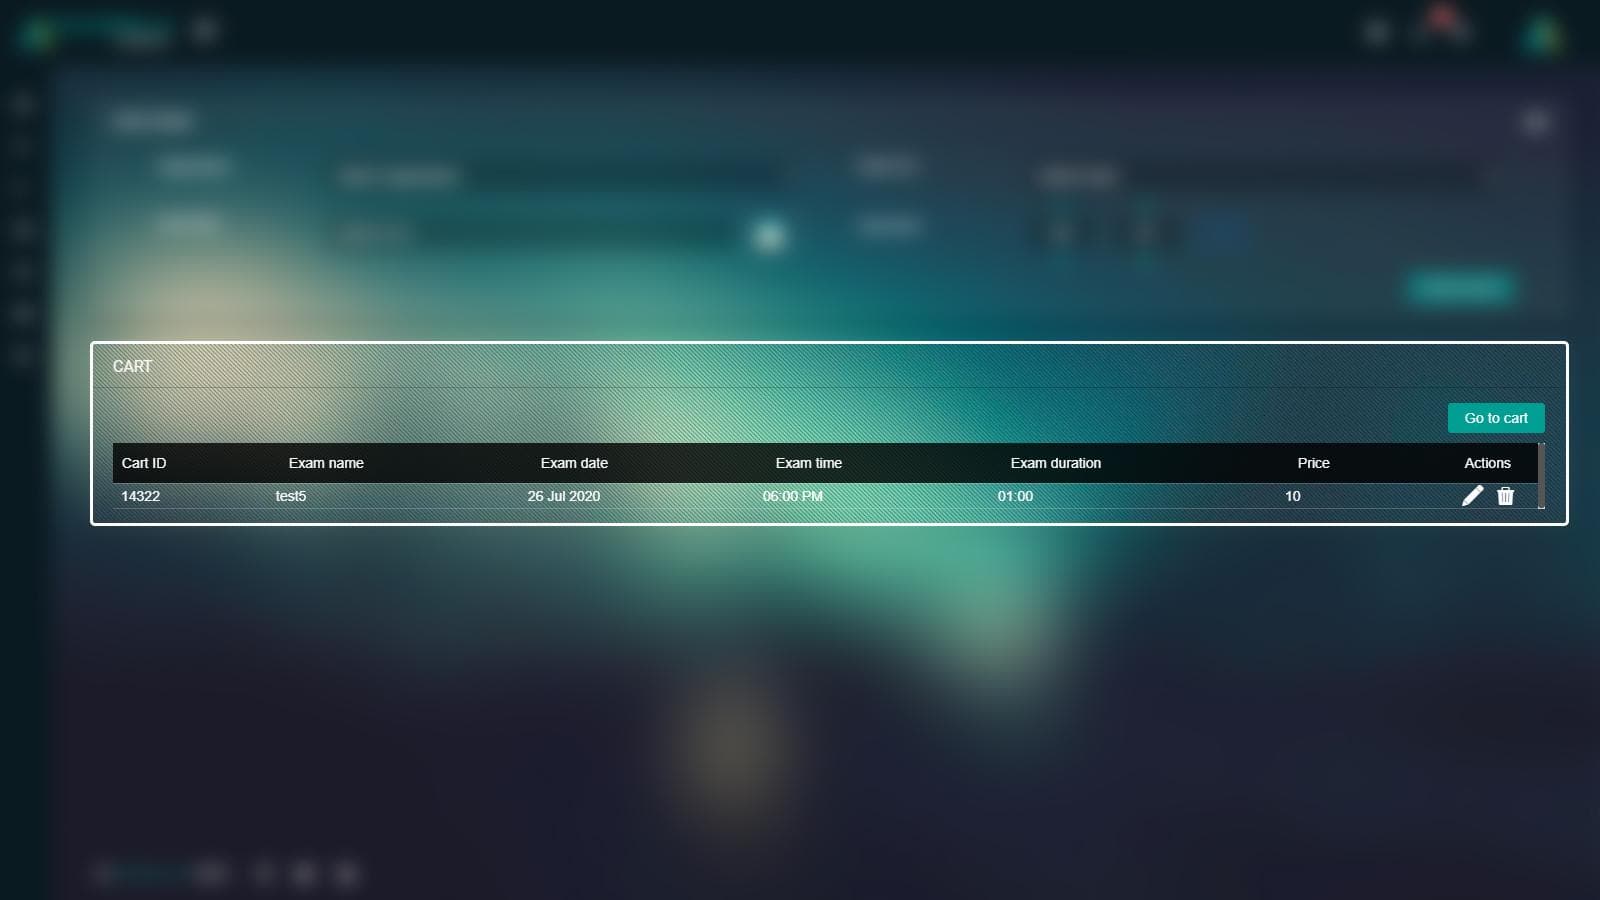
- After selecting your time slot, you will be brought to the payment screen to reserve your slot. If your Exam Sponsor elects, your payment will be set to $0 or will be bypassed. If you are paying for the exam, you will click Add to Cart and will be prompted to enter your payment details.
Reschedule Exam
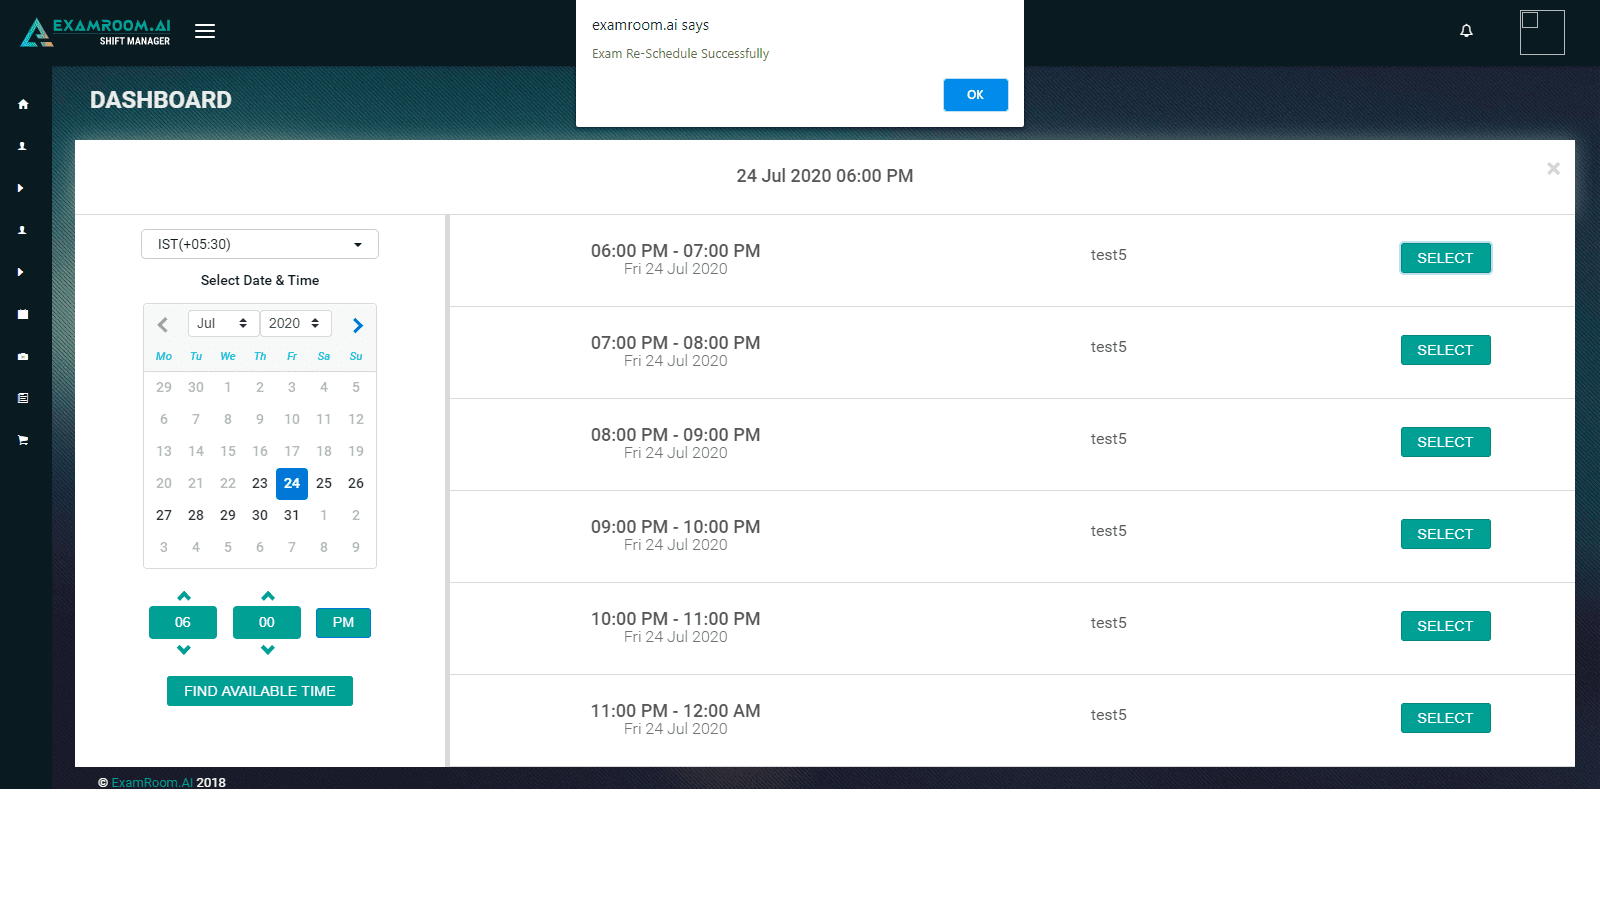
- Go to Reschedule/Cancel option from the side menu.
- Once on the Reschedule screen, click Reschedule next to the exam you wish to reschedule.
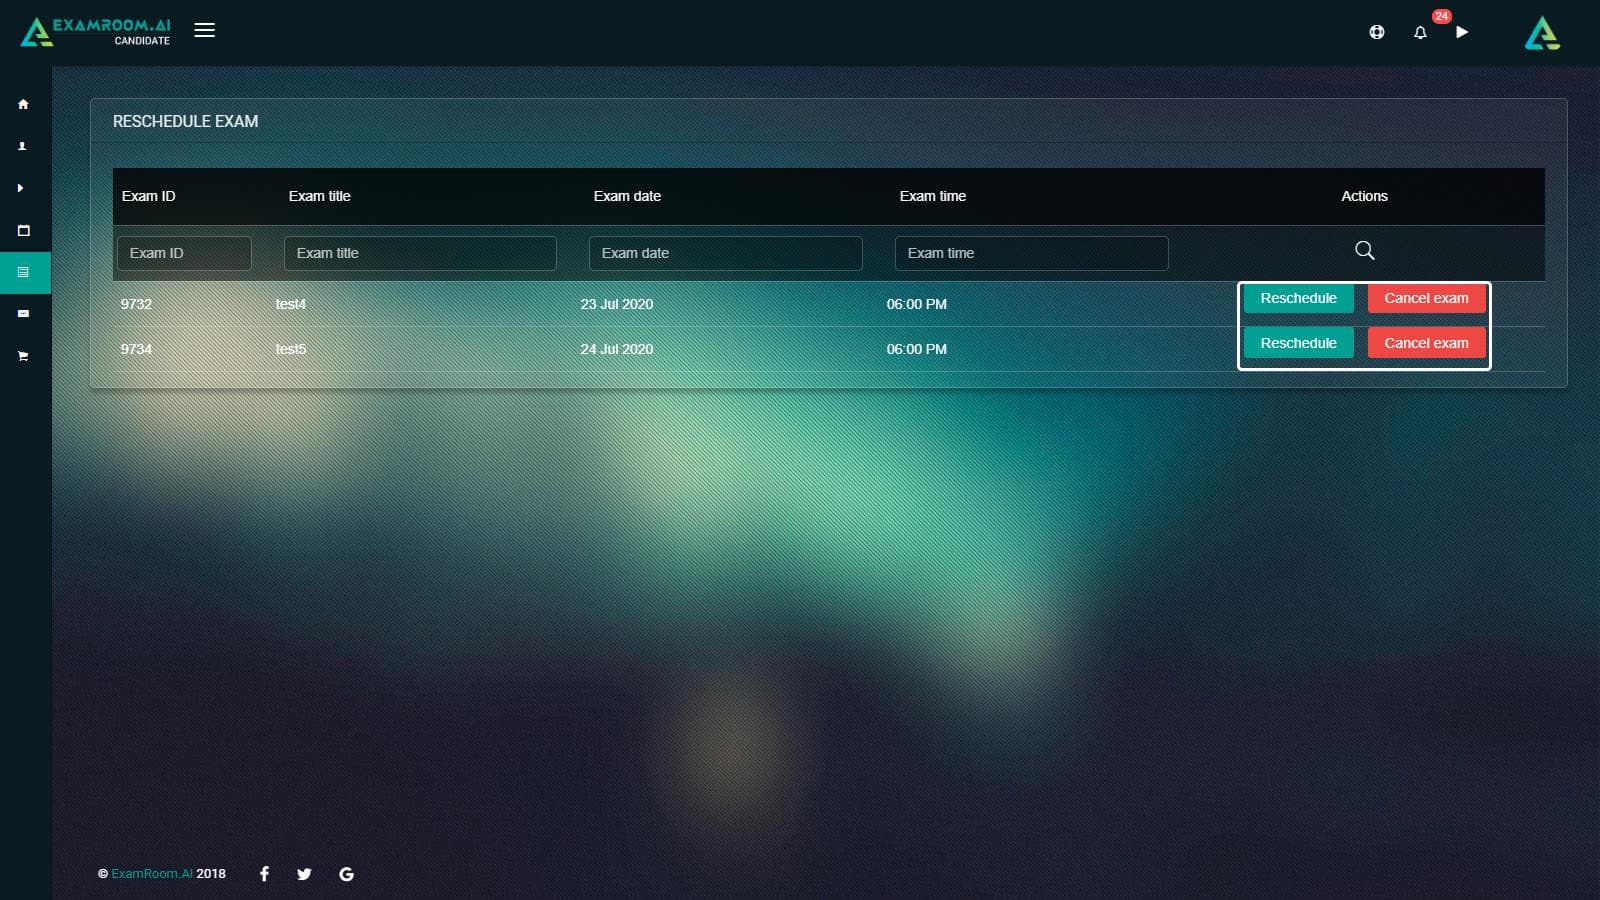
- After clicking Reschedule then the scheduler/calendar will appear. Click on the available green slot for your preferred day and select your preferred time.
- Once you have chosen your preferred day and time, you will pick from the available time slots based on the length of your exam.
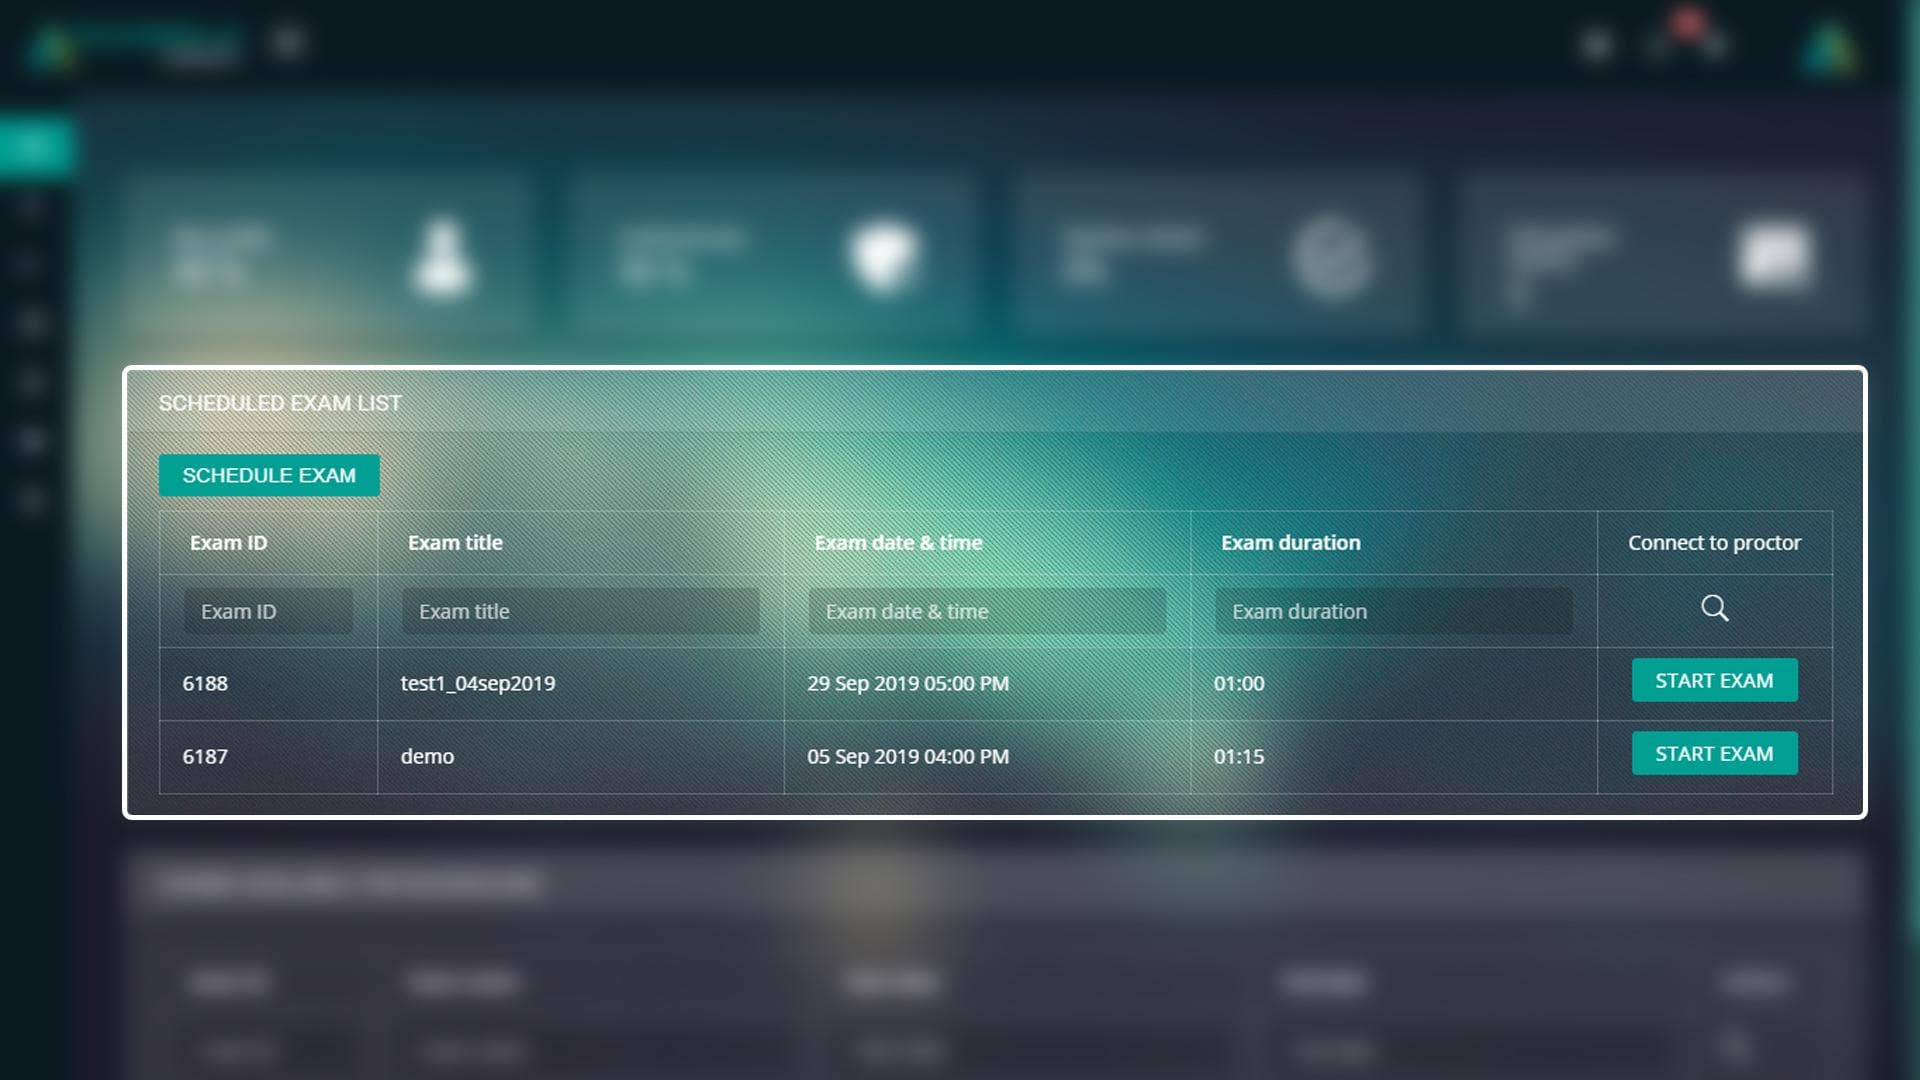
Take An Exam
- From the Candidate Dashboard under the scheduled exam list, click on the Start Exam button.
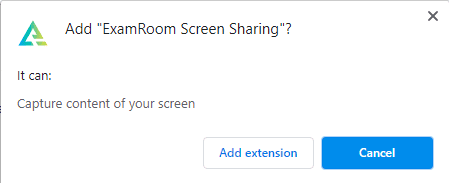
- If you do not already have the Google screen share extension installed on your system please click Install.
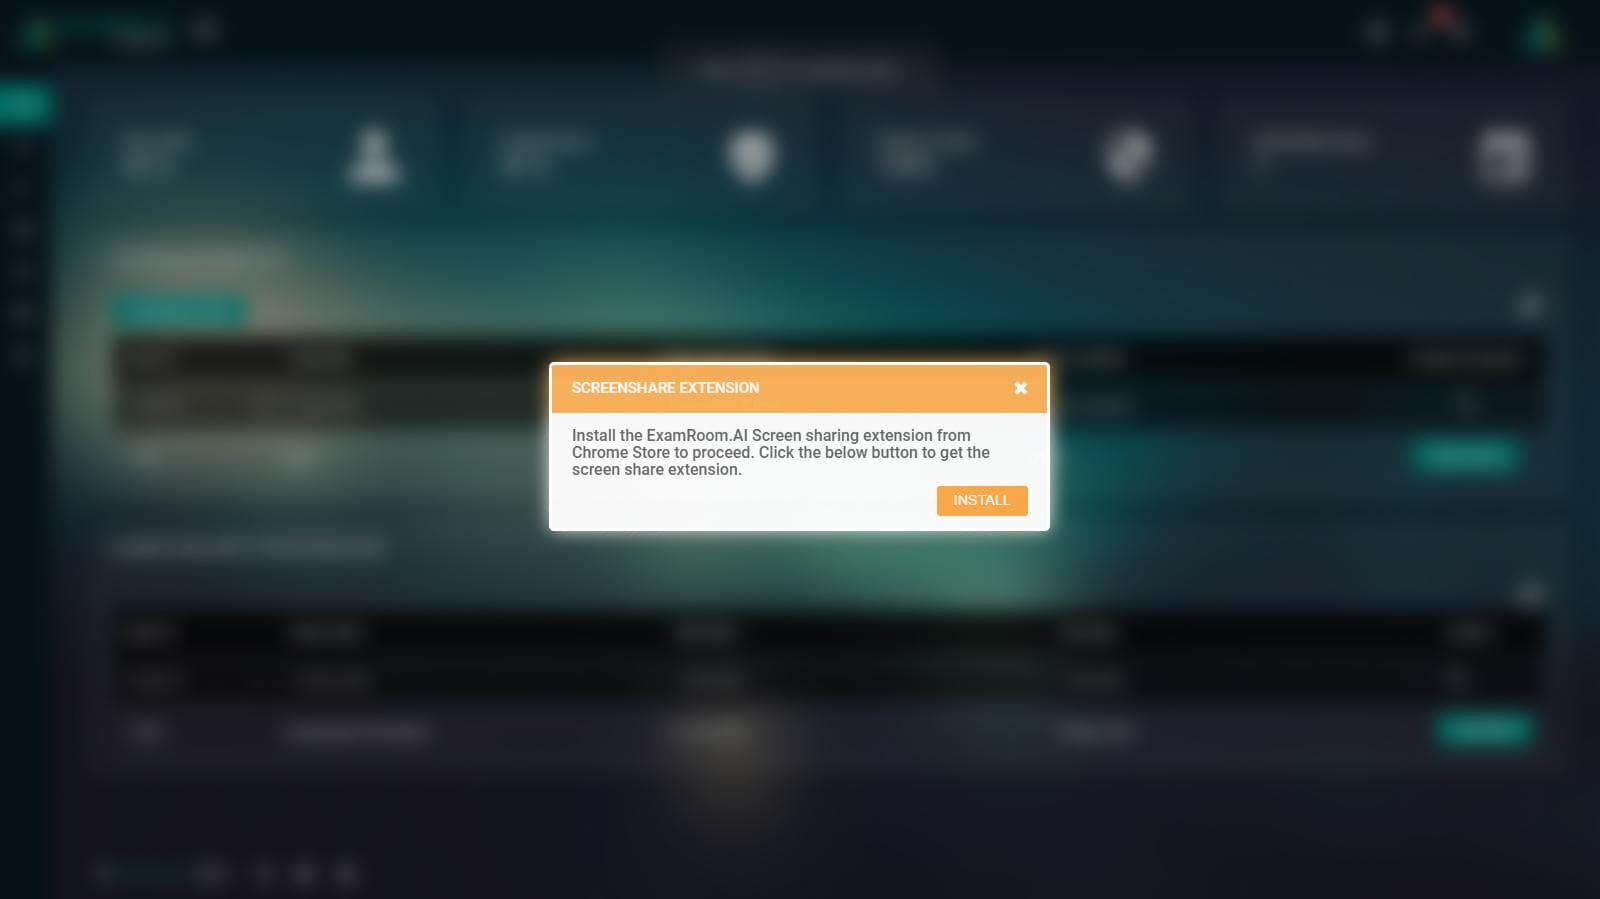
- After clicking Install, a new tab will open. You will click Add to Chrome.

- Then you will click Add extension.
- Once the extension is installed, you can close the tab and go back to ExamRoom. You will click Start Exam again.
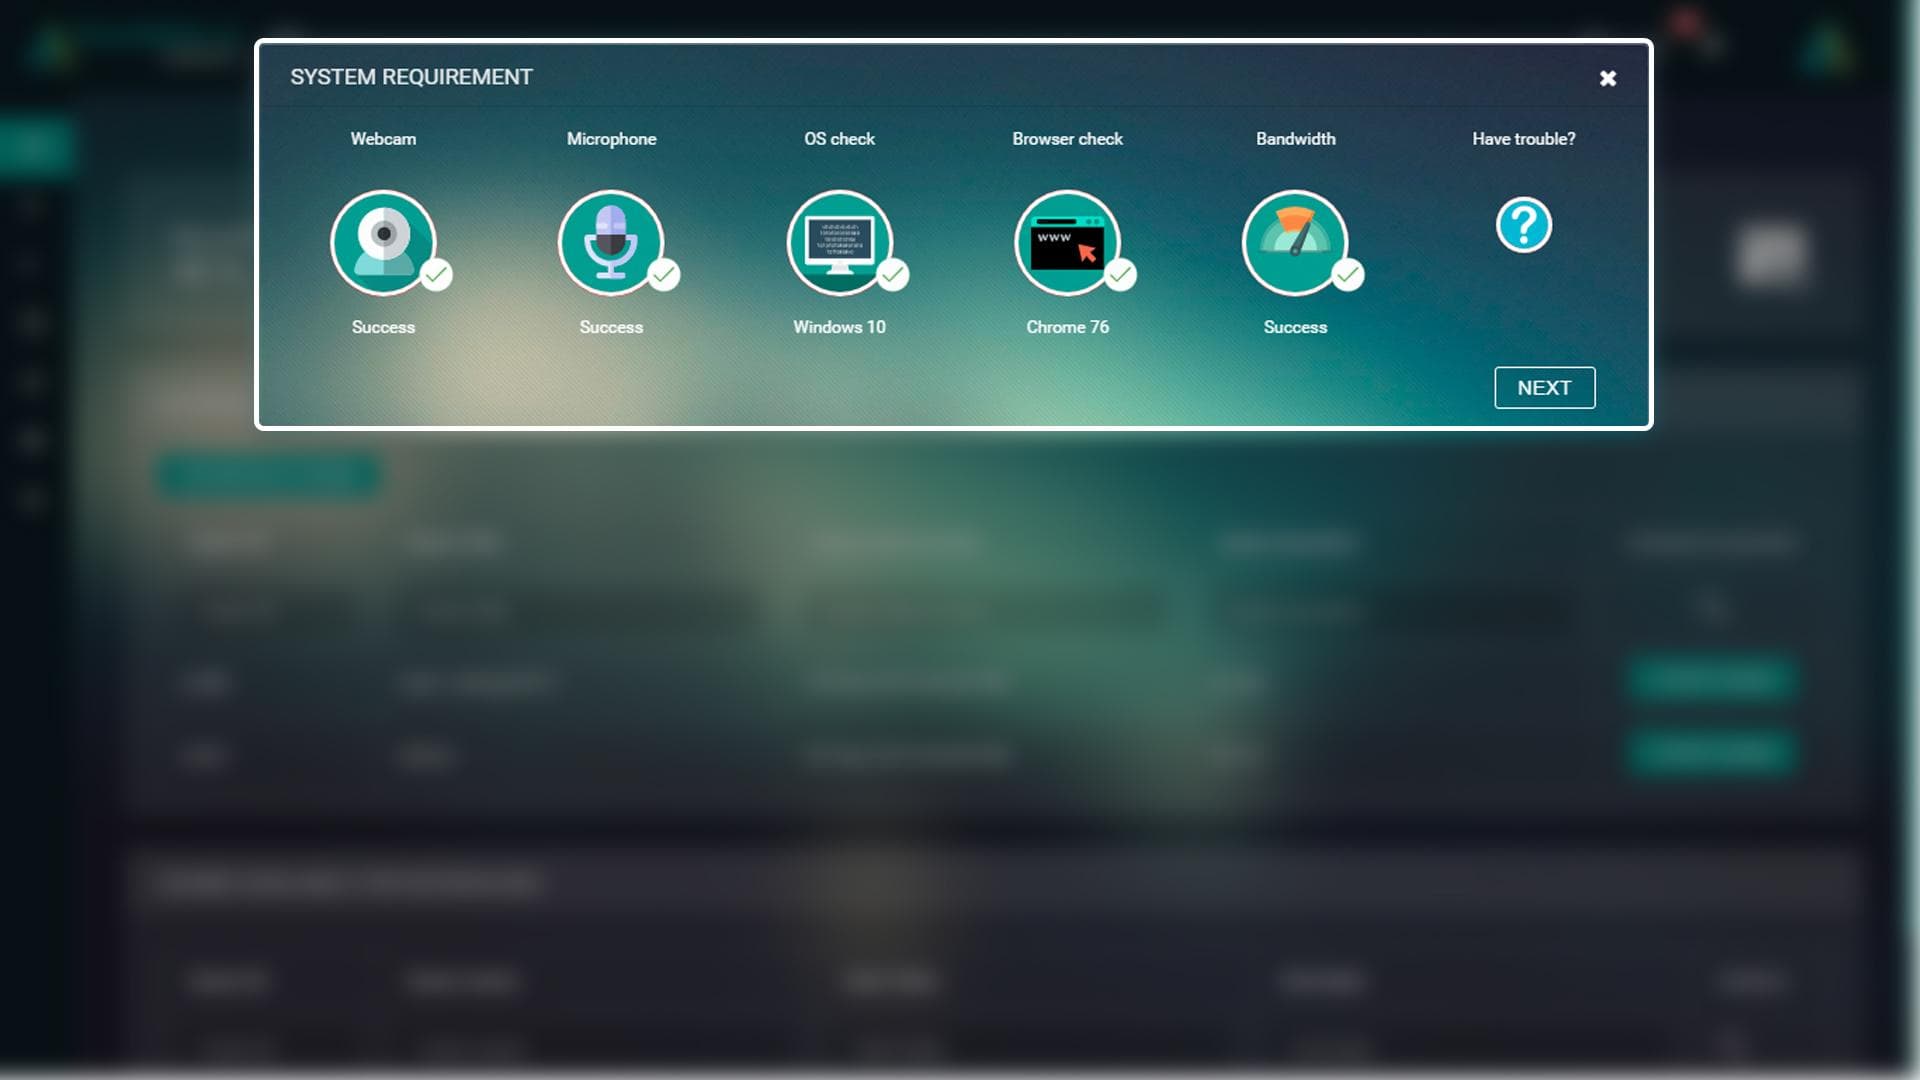
- After clicking Start Exam again, the system check will pop-up. This is to make sure that your camera, microphone, Operating System, browser, and bandwidth are working properly. If all the components are checked green, click Next.
- If any item is marked red, please click on the icon to change the camera or microphone options. If your bandwidth is low, please be sure to turn off all WI-FI enabled devices or connect to the modem/router with an ethernet cord.
- If you need help, please contact us via the chat support icon on the bottom right-hand corner of our website.
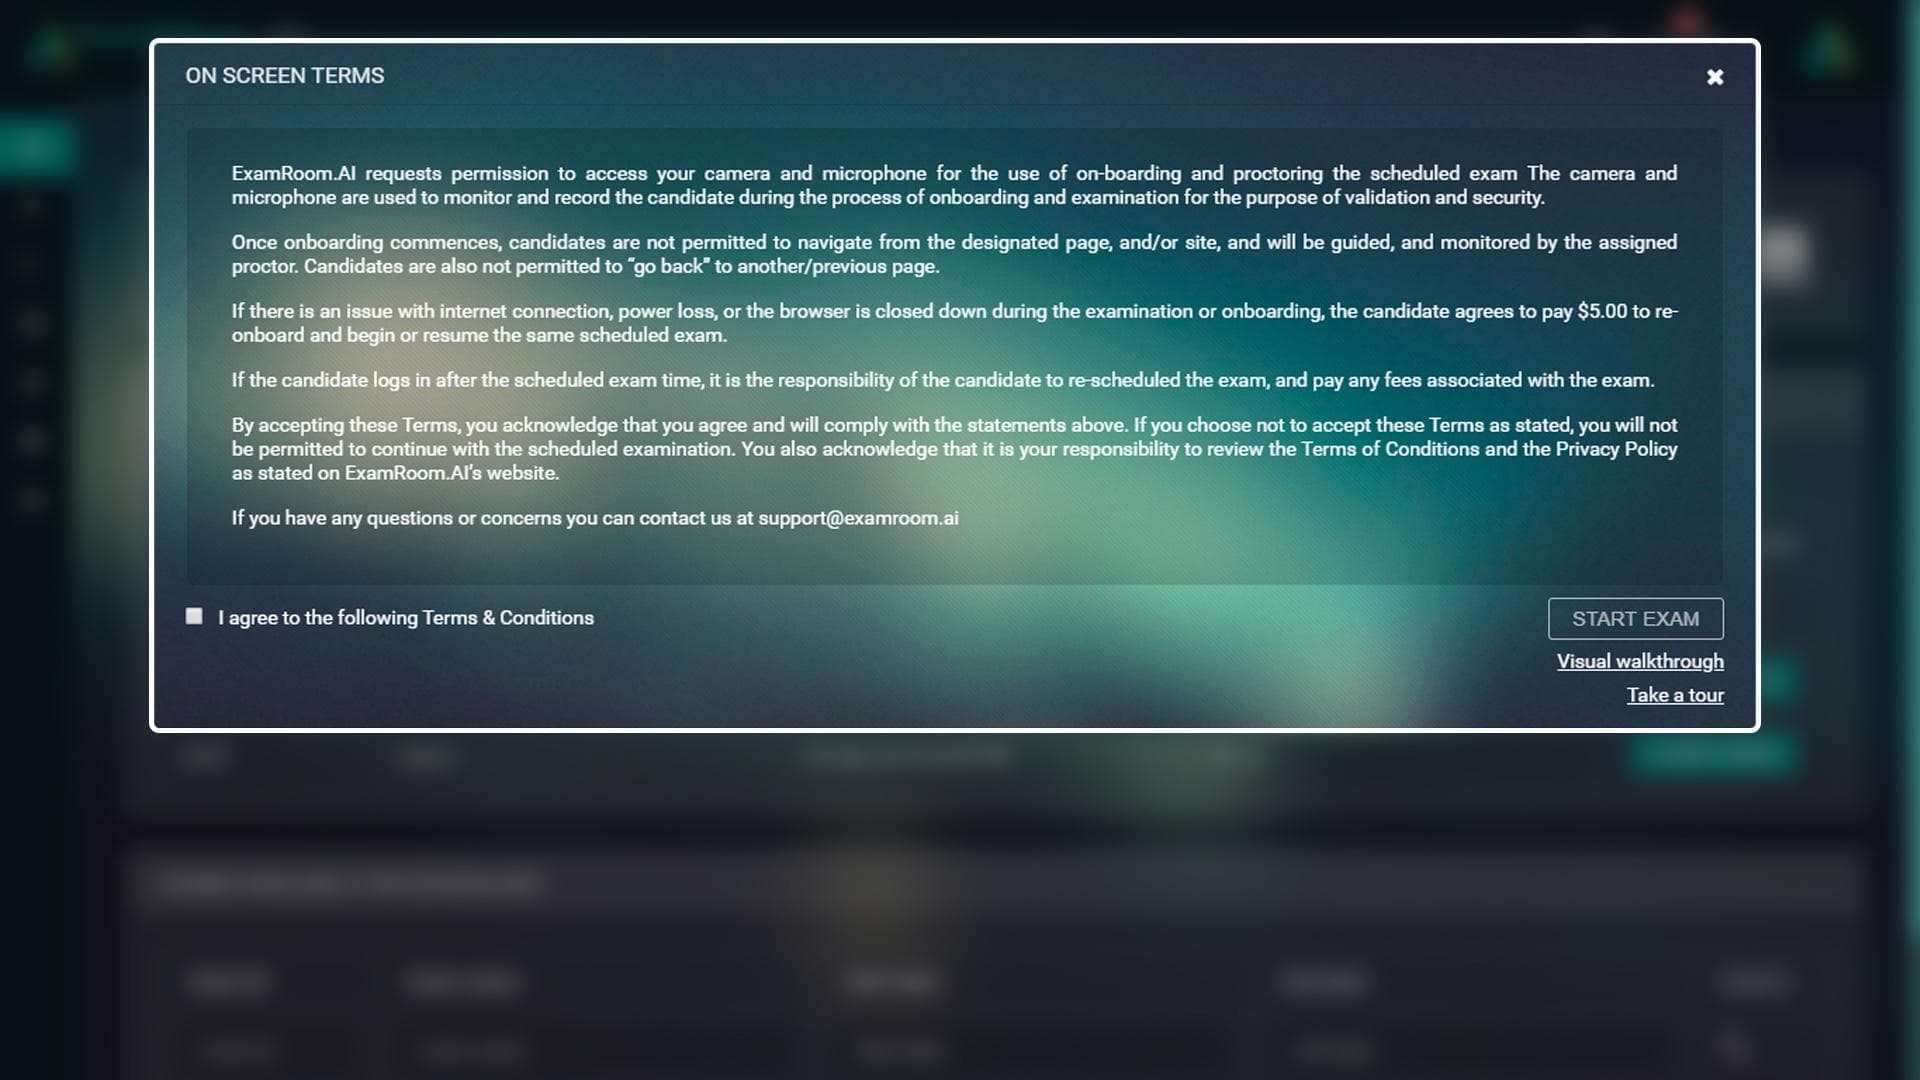
- Once system check is done the ExamRoom On Screen Terms will pop-up next. Please read the terms carefully then click the check box to agree to the terms and click on the Start Exam button.
- A demo/walkthrough of how to start an exam is available through two (2) links: Visual Walkthrough or Take a Tour.
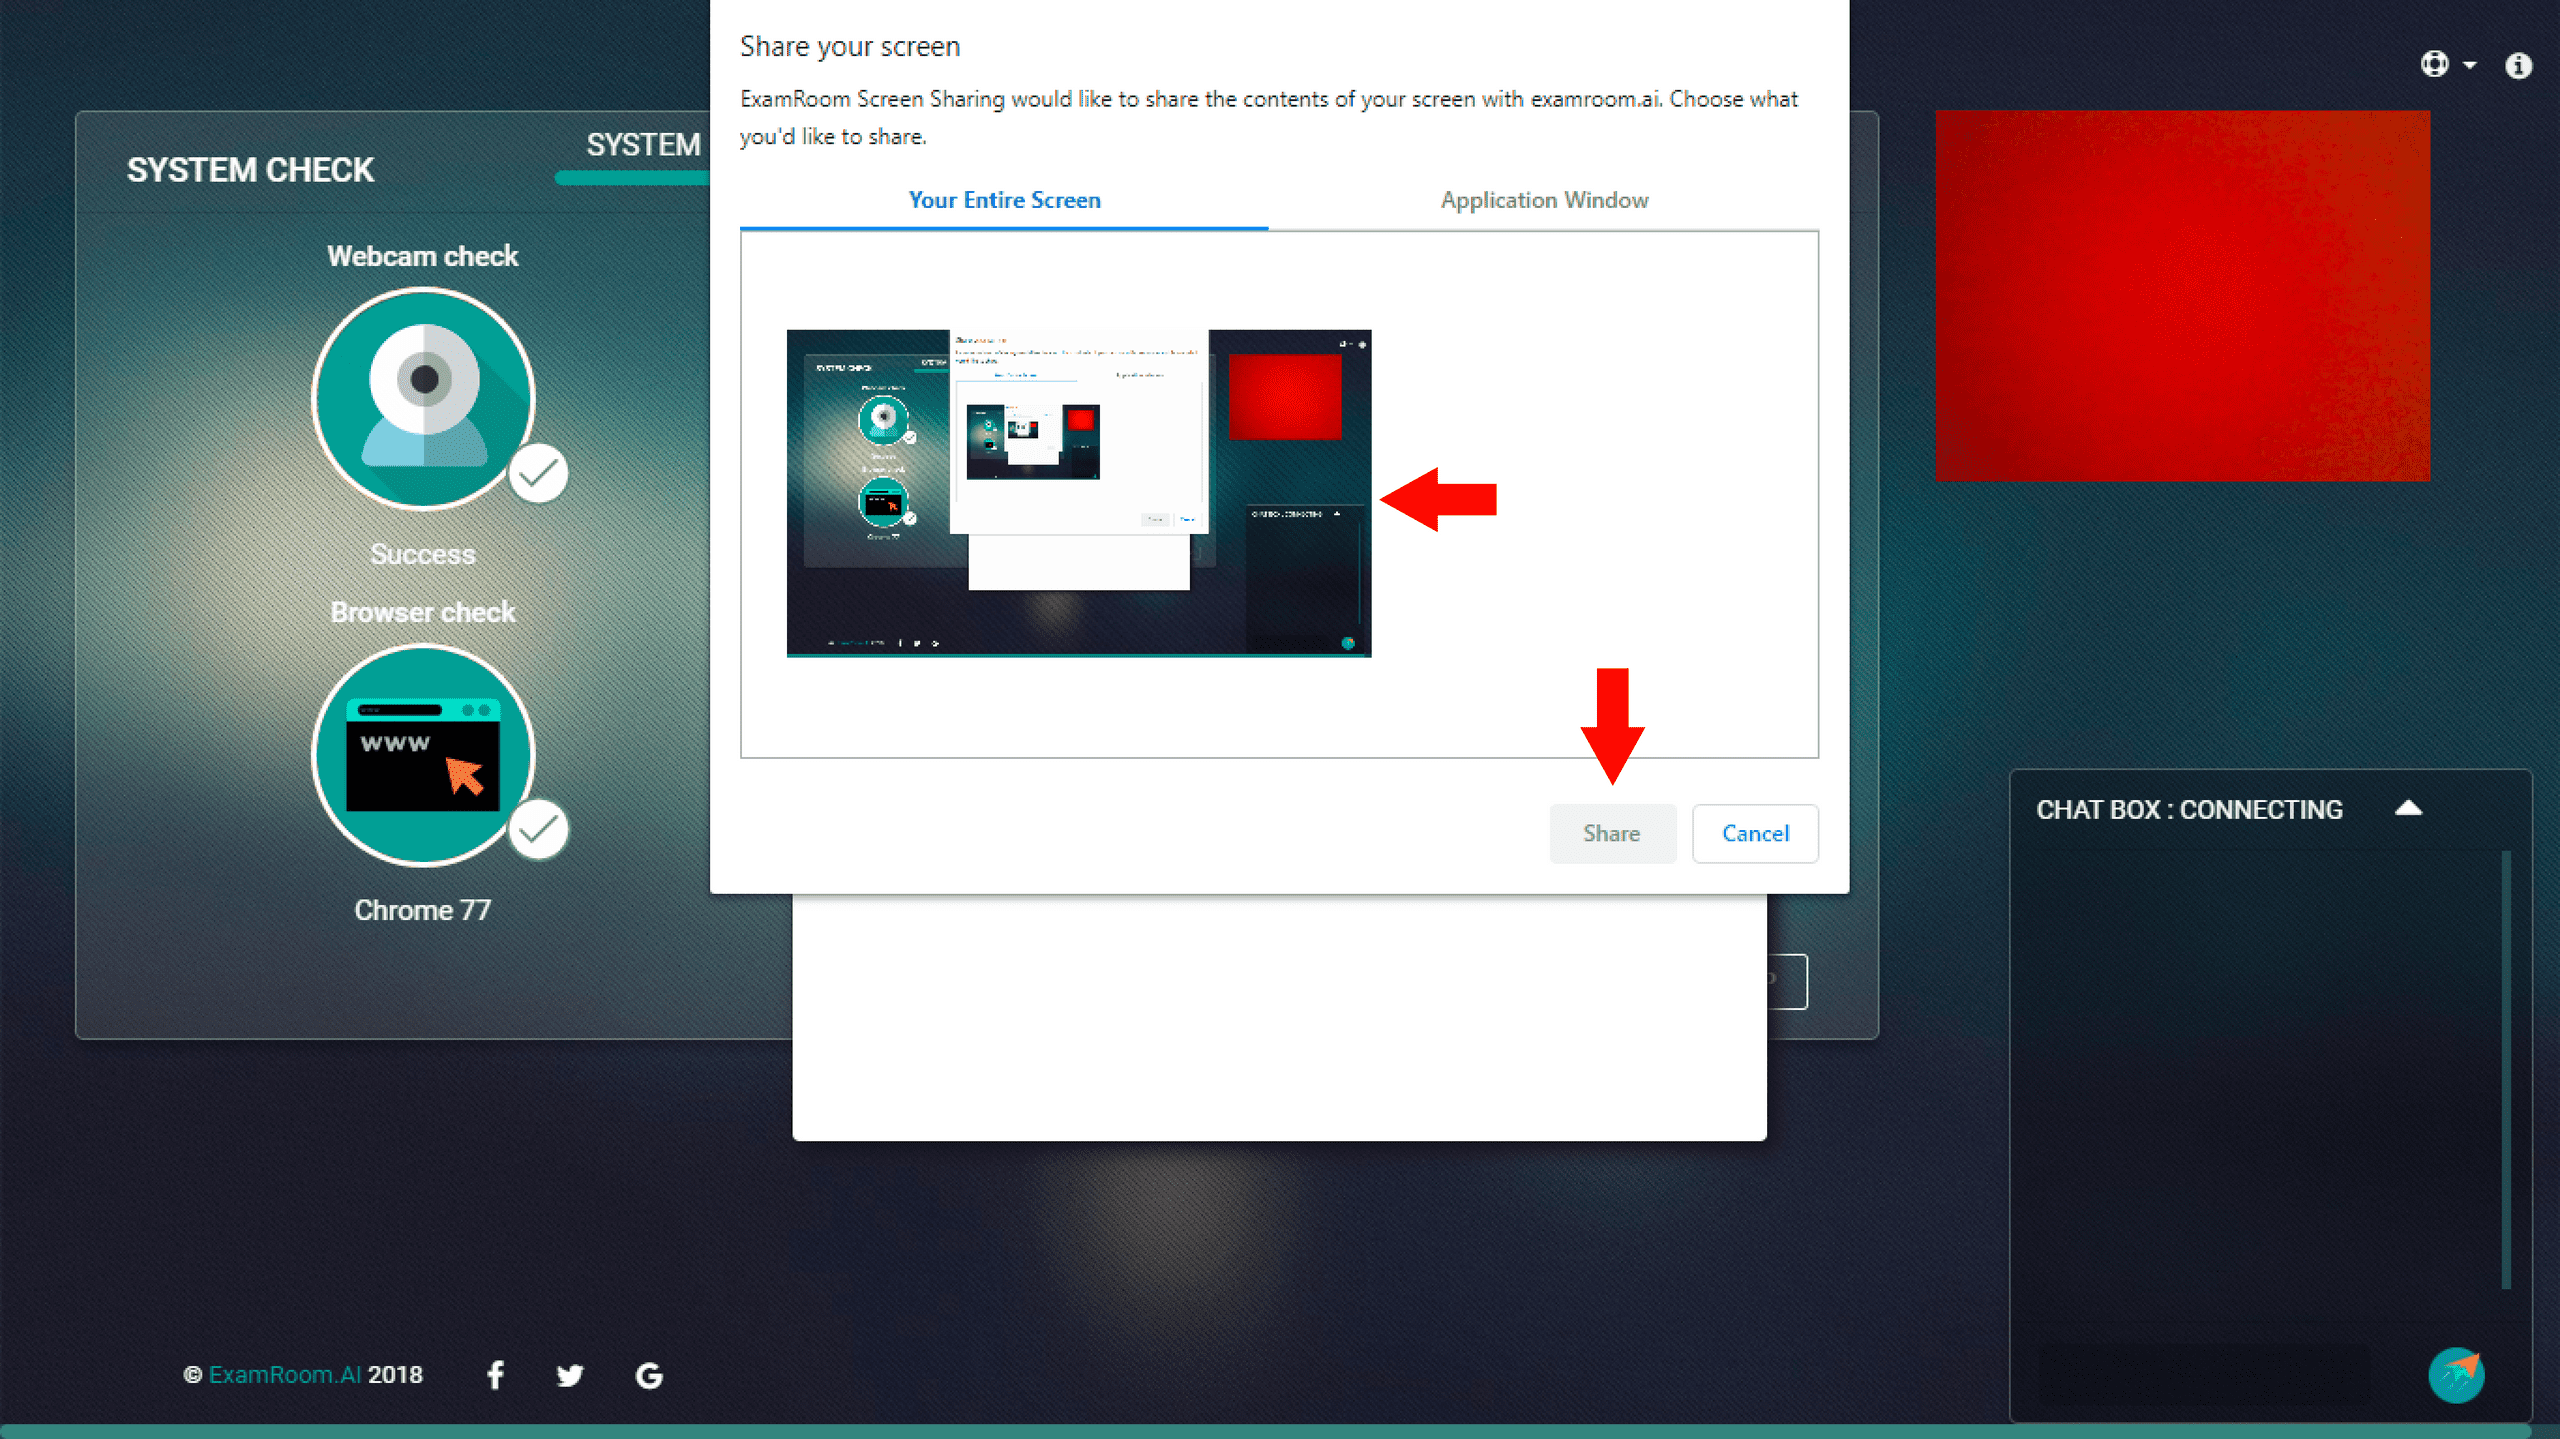
- Next, you will be asked to share your screen. Make sure that you share your entire screen.
- It is important that you do not stop sharing your screen until you have received verification that your test has been completed and/or ended by the proctor.
- Please make sure you click the picture of your screen in the box, then click the Share button.
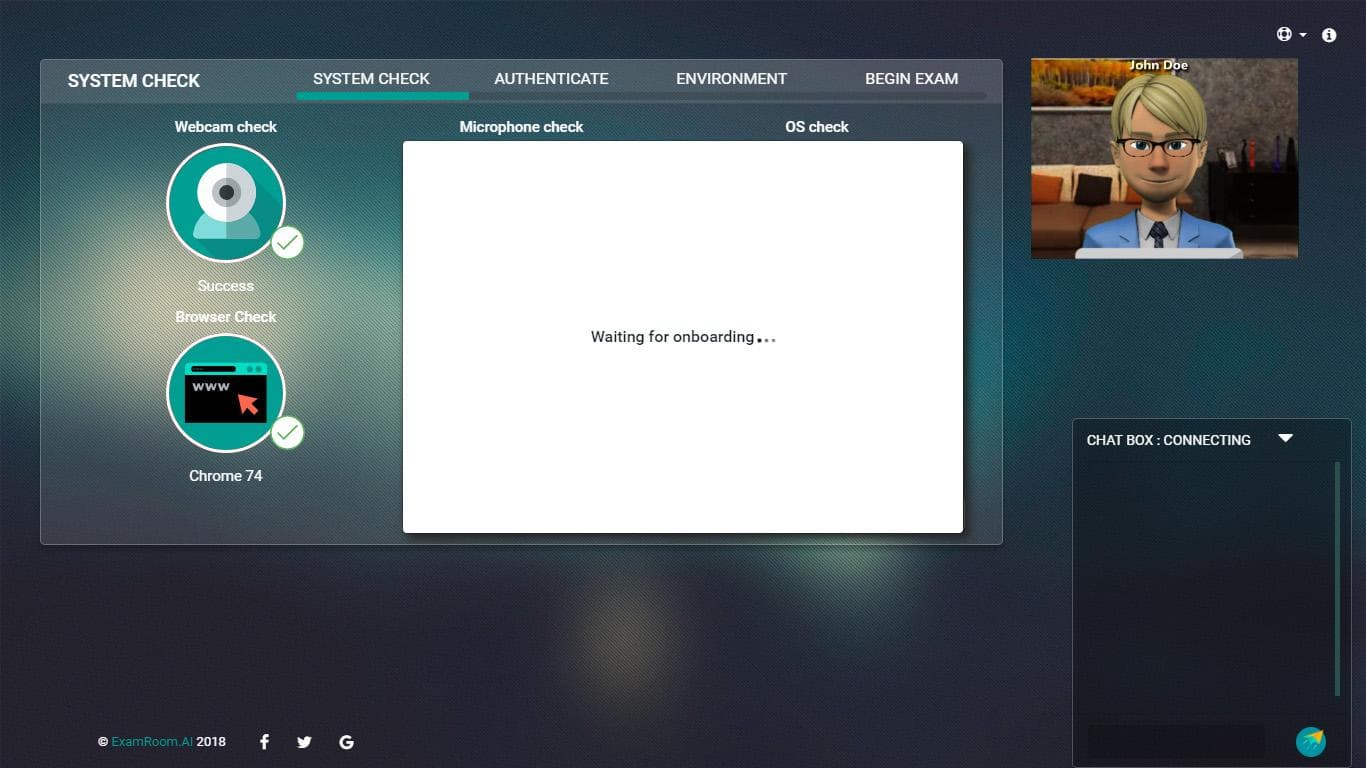
- After you click the Share button, you will be directed to the onboarding agent. Please be prepared to wait a minute or two for the onboarding agent to welcome you.
- Next you will be greeted by the Onboarding Agent (OBA). The OBA will guide you through the verification process and will click through the process for you.
Systemcheck
- The first step is the System check. This is done by the OBA to ensure that your computer device is in proper working order and that your payment has been received. Once the system check is approved, the OBA will click on the Next button.
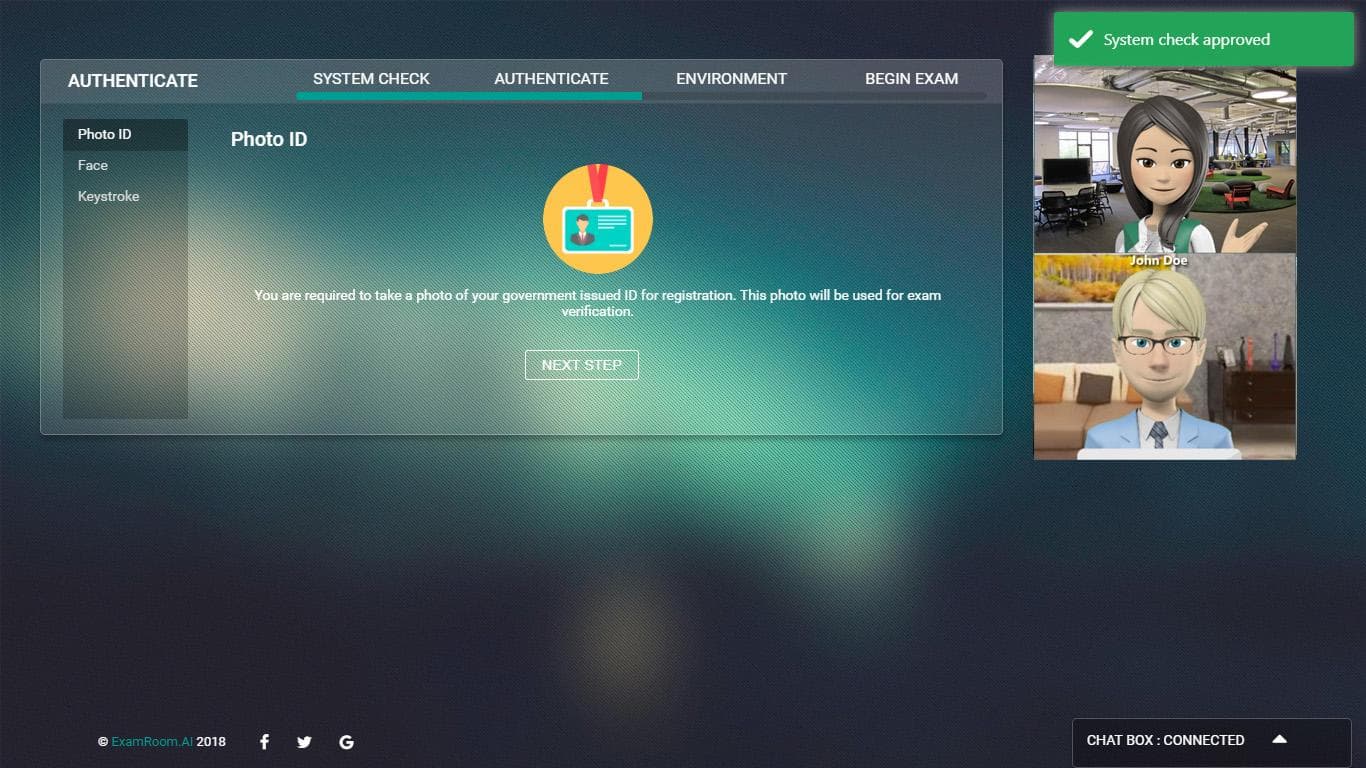
Authentication
PhotoID
- After the system check is approved, you will be brought to the Authentication part of the onboarding process.
- Here, the OBA will ask you to place your Government Issued ID in front of the camera so that they can capture a picture and compare it to your ID provided during the identity registration process.
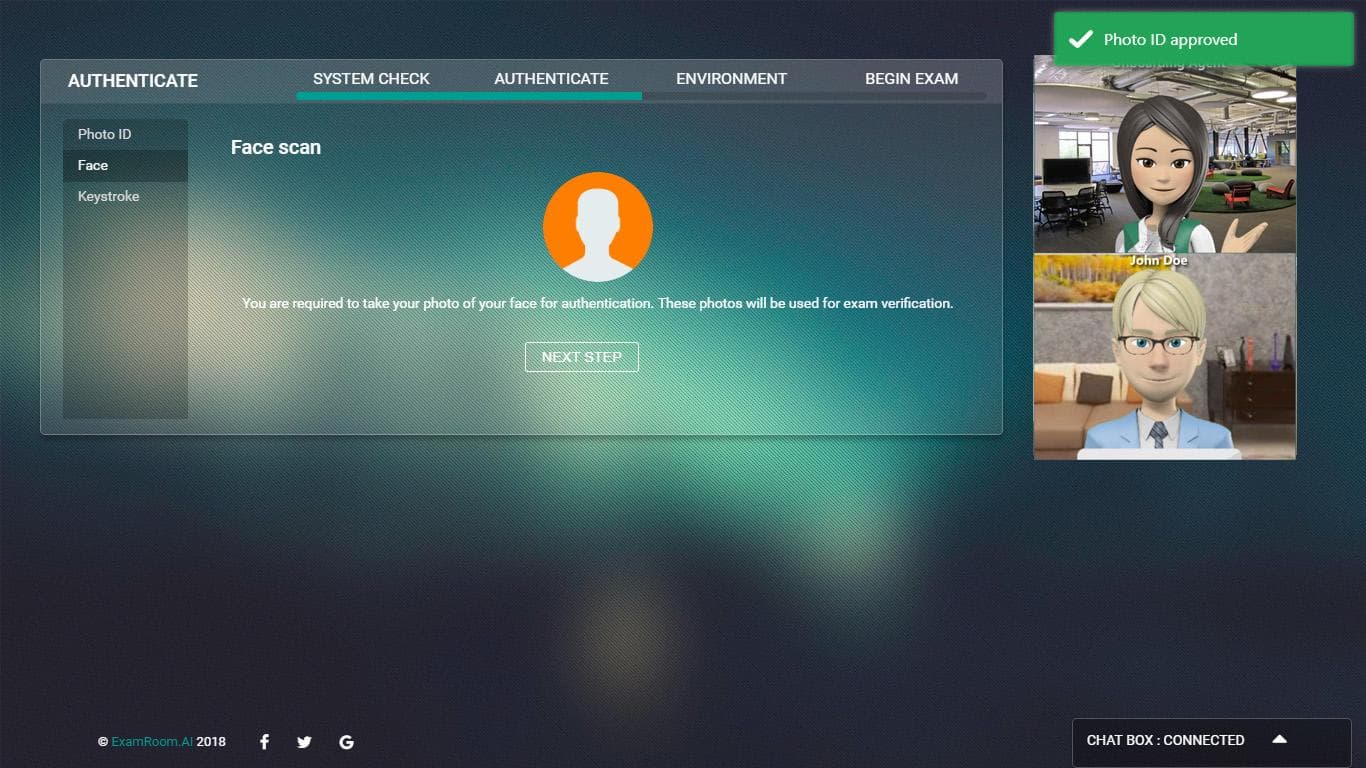
Facescan
- Once the ID has been verified, the OBA will click on Next button where you will be brought to the Face scan.
- During this step, the OBA will notify you that they are going to take your picture for a face scan to continue in the authentication process. You will be asked to look into the camera and the OBA will take your picture. Once your photo has been verified, the OBA will click on the Next button.
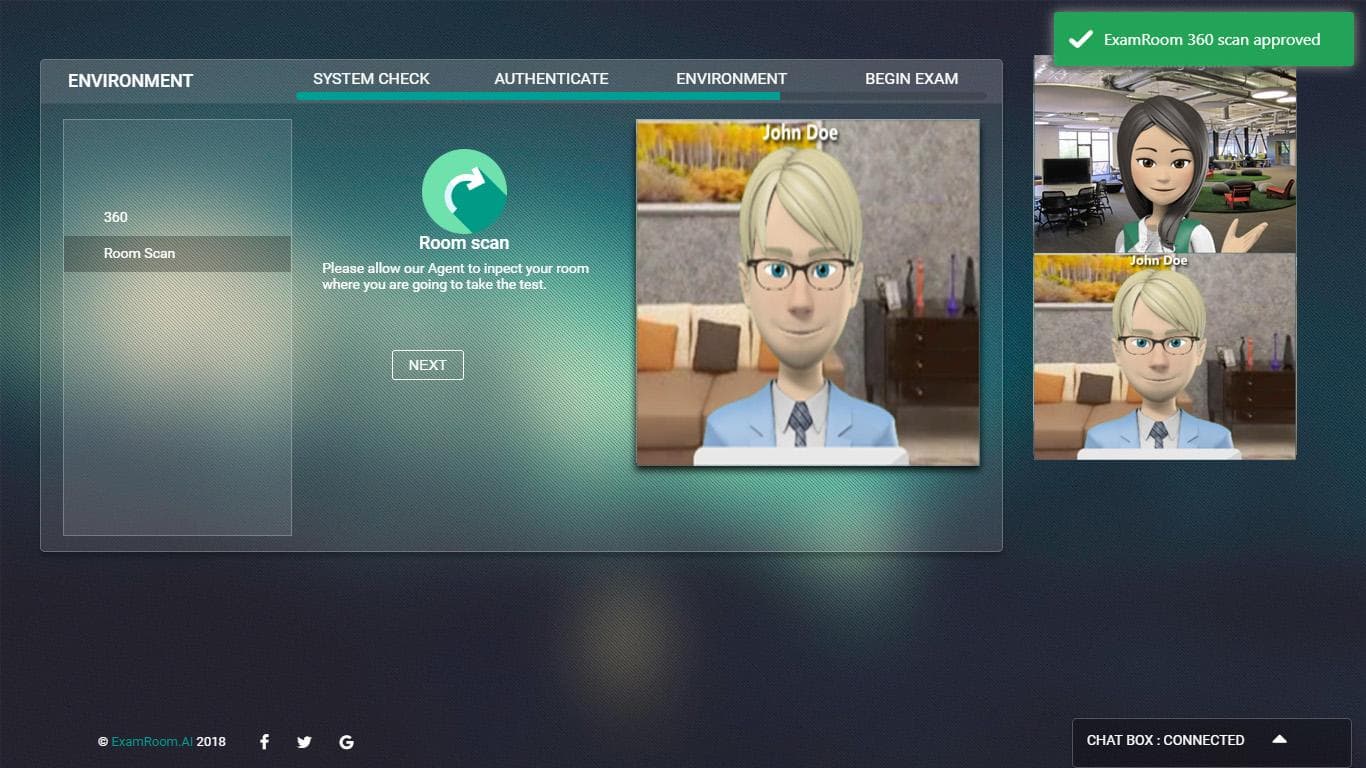
Roomscan
- The next step is the Room scan. It is important that you rotate your device’s camera 360 degree so that the OBA can see your entire surroundings.
- You will be asked to show underneath your desk, on your desk, or anywhere else in your testing room that the OBA asks you to display.
- The objective is to make sure that your desk and testing area are clear of any prohibited materials, devices, food/drink, people, etc.
- Once your room scan is approved, the OBA will click on the Next button.
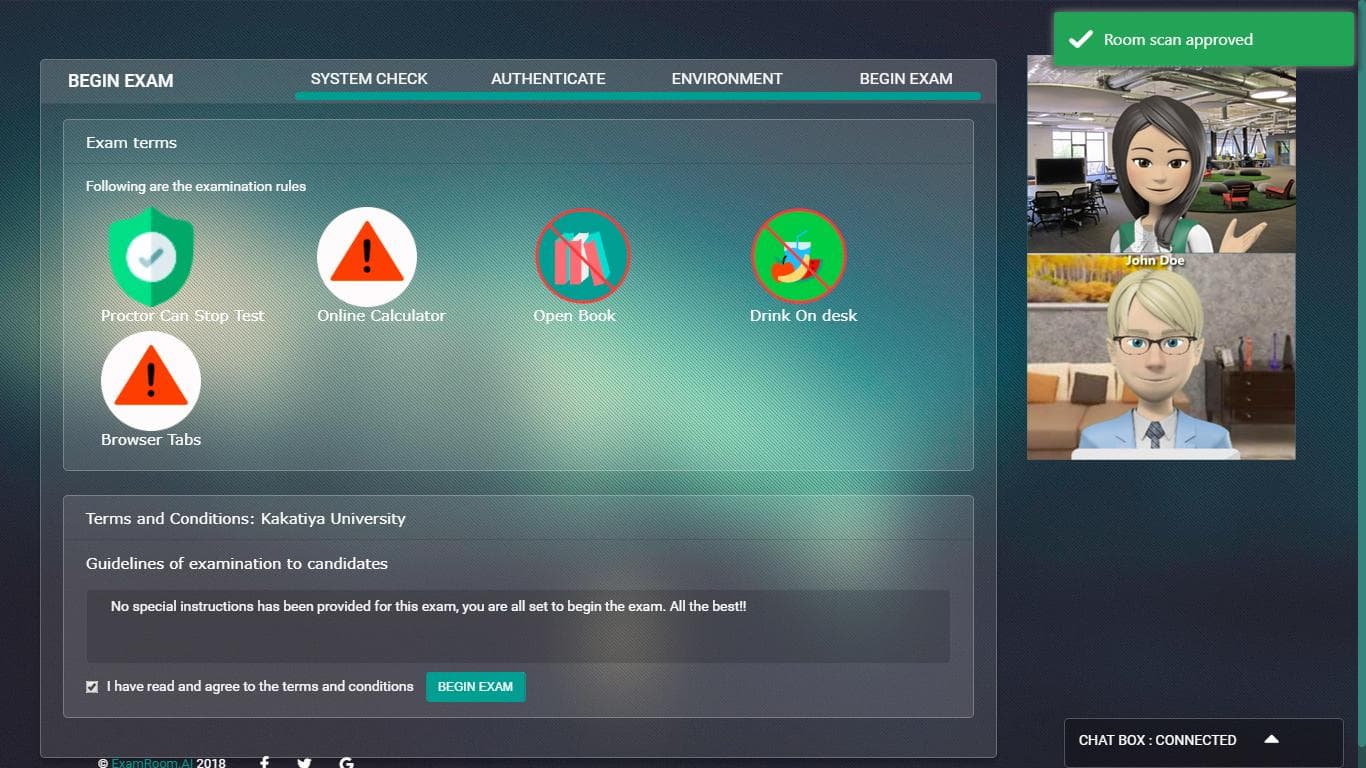
Rules Page
- After the Onboarding Agent (OBA) has completed the verification process, your exam rules will be displayed.
- You will see the rules icons set by your exam sponsor. It is important that you review your candidate handbook or bulletin provided by your exam sponsor.
- After reviewing the rules, please click the box to agree, and then click the Begin Exam button to be transferred to your proctor. This may take up to a minute or two before you are connected.
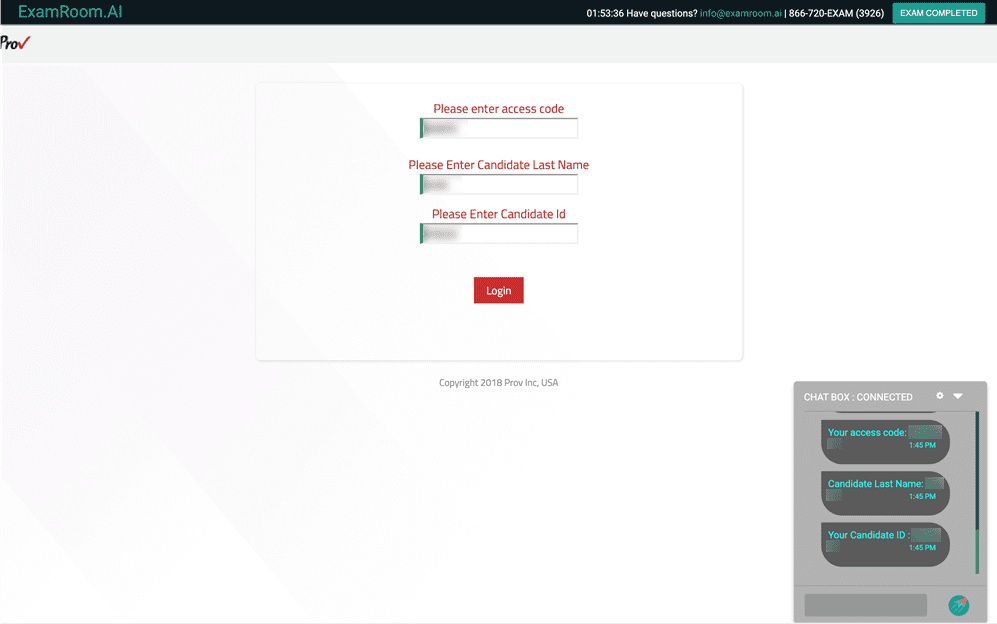
- You are now connected to your proctor and it is time to log into your exam.
- If your exam requires an access code, the proctor will provide it via the chat box in the lower right-hand corner. You must manually type the code in, you cannot copy and paste.
- When you have entered the required information click on the Login button and you will be directed to your exam.
- When the exam is completed, click on the completed, done, submit, etc. button or notify the proctor through chat box and the proctor will end the test for you.
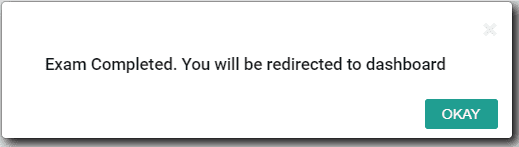
- A notification will confirm that your exam has been completed. Please click the Okay button and you will be directed to the dashboard.